Looking to add a chat widget to your multivendor website? Well, you have come to the right place.
Every marketplace should have a chat option that customers can use to reach out to the stores or marketplace owners. It’s like a must-have feature for every online marketplace nowadays.
We are going to discuss the importance of this feature, the features of one of the most amazing Chat Widget plugins, and how to enable it for different kinds of multivendor marketplace plugins.
Let’s start.
Table of Contents
Importance of Chat Widgets for online marketplaces
Chat widgets support is very important for any kind of online marketplace. Live chat is one of the most important elements of an online store. This feature helps your customers to reach your business easily.
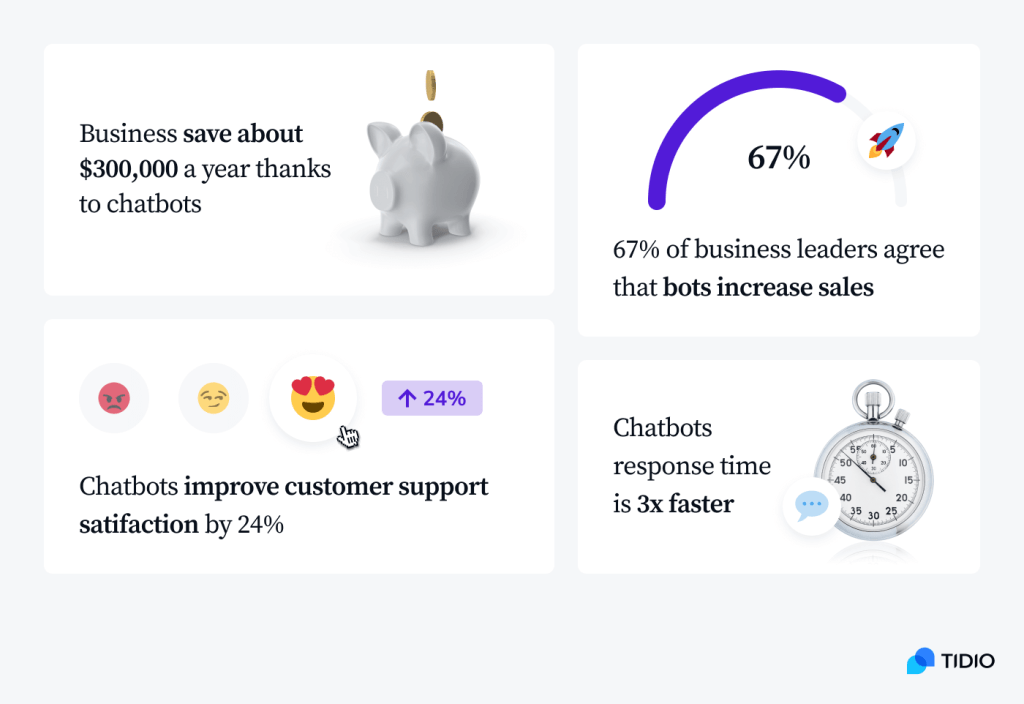
These chatbots also help you to respond to your customers faster and easier. All of these benefits can increase customer satisfaction by 24% which helps to retain customers drastically.

Learn how chat widgets can help your online store:
Easy to contact support
To put it simply, live chat software makes it easy for customers to contact your support team. When you have live chat options there’s no need to dial a phone number or listen to an instrumental song until someone from your team picks up the call.
The live chat feature can easily connect a customer to a support agent, and as a result, enable customers to receive immediate answers to any questions they may have.
Let’s assume that a potential customer wants to know whether you can deliver items to their location and what your delivery rates are. If these are commonly asked questions, you can easily set up an FAQ feature in your chatbot, that will automatically answer such questions.
Moreover, live chat allows customers to multitask. For instance, when a customer is waiting to start chatting with an agent, they can be with doing something else, such as watching movies online.
Saves budget
A great benefit of adding this support to your business is that you can save money.
Customers usually contact you via phone or email. However, this is time-wasting for both parties involved. Moreover, it can be quite expensive as you will need to employ people to answer the phone and respond to emails. Live chat allows your customer support agents to address multiple queries at the same time. To put it simply, an AI-powered live chat makes it easy for customers to contact your support team. When you have live chat options, there’s no need to dial a phone number or wait on hold. Therefore, you get to decrease the cost of labor while allowing your team to be productive.
Also, live chat helps you streamline your customer support process because it allows you to resolve customer issues right off the bat. It minimizes instances of unresolved backlogs. As a result, your second and third-tier customer support agents can focus on more advanced issues.
Online experience
As we said earlier, live chat support makes it easier for customers to contact you. They can continue their other work as well as get support. Instead, they can just head to your website, open up the widgets, send their questions, and let the support staff on the other end answer them.
Additionally, adding live chat support allows you to salvage as many abandoned carts as possible, as 57% of online customers leave their purchase if they fail to receive an immediate answer from customer support.
Get customer feedbacks
Besides providing excellent support to the customers and increasing sales, live chat also allows you to learn more about your buyers. It allows you to collect customer data, which comes in handy when building an effective marketing strategy.
Customer data allows you to gain better customer insights, which are useful when looking for ways to improve your products and services. It should go without a doubt that you can also use this data for deciding how to promote your business and use it to grow in the best way possible.
However, in order for that to happen, you will need to review your chat history and conversations. From there, you can gather a lot of valuable information, such as frequently asked questions that point to common customer pain points. You can also use this data to collect common words and phrases that your customers use to describe your products.
Provide customer satisfaction
Live chat software is designed to provide immediate and useful customer service and support.
In fact, it has the highest customer satisfaction rate among all customer support channels because it allows you to provide immediate resolutions in the most efficient way possible.
Say that a customer wants to know whether purchasing various products on your online store makes them eligible for free shipping. All they would need to do in order to find the answer is to open up the chat widgets, send the query, and then wait briefly for a reply.
There’s no need to call someone on the phone and stay on hold for minutes, or even hours, just to get a reply about something that can be answered with a simple “yes” or “no.”
Features of Chat Widgets plugin
- You can show up to 2 different chat channels at a time.
- You can select the location of the widget (bottom left/right).
- You can select triggers when the chat widgets should appear. You can show it after a few seconds, on the page scroll, or use the exit intent trigger.
- You can choose from amazing attention effects including bounce, waggle, sheen, and spin, fade, blink, pulse. Your attention effect will help you capture the attention of your website visitors and increase the conversion rate.
- The pending message icon will let your user know that you’re waiting for them to contact you.
- Fully customize all chat icons including colors and text on hover and chat buttons opacity.
- In the pro version, you will be able to show all 19 channels
- For widget customization in the pro version, you can choose a background color, change the size of your widget, choose from different widget designs, or upload your own.
- Change each channel’s background color, upload your own icon, and set the position of the chat widget wherever you want.
- Style your widget icon the way you want with the custom CSS feature.
- You will get different button designs
Now you know the amazing features of the chat widgets, let’s see how you can install and use this plugin.
How to enable Chat Widgets on your website
We are going to show you how to enable the Chat widgets with WCFM and Dokan.
You can easily enable the widgets with WCFM with a few simple steps. Then you can add any kind of social channel you want. Here is the detailed process,
How to enable Chat Widgets with WCFM
Enabling chat widgets in your website with WCFM is just a matter of a few simple steps. Let’s see how to implement it,
Step 1: Install Chat Widgets compatible with the Multi-vendor Marketplace
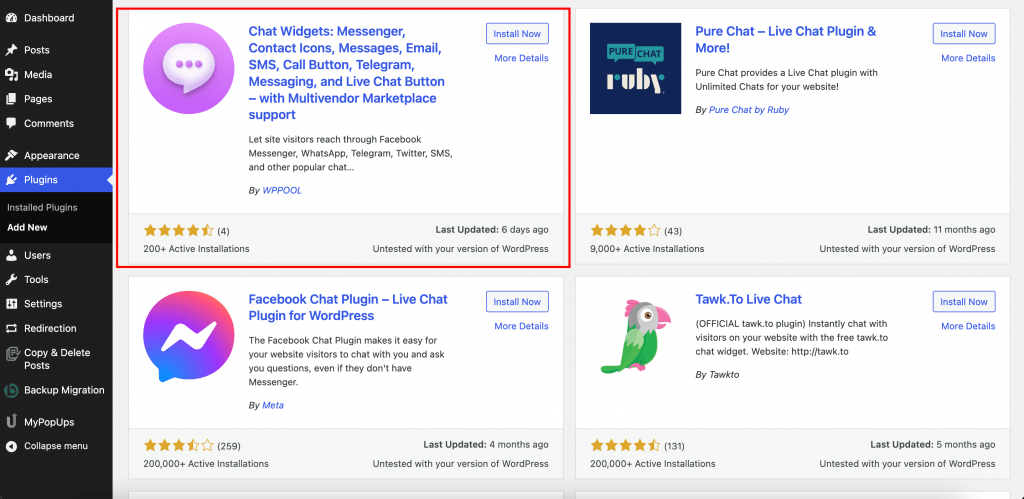
First, go to WP-Admin–> Plugins–> Add New. There type ” Chat Widgets WPPOOL“. Then install and activate the plugin.
Step 2: Install WCFM
Next, you need to install WCFM on your WordPress Dashboard. We are hoping that you have already set up WooCommerce. Again go to WP-Admin–> Plugins–> Add New. There type “WCFM”. Then install and activate the plugin.

If you haven’t set up WCFM you can follow the article from here.
Step 3: Go to the frontend and configure Chat Widgets
Now, if you go to the front end or in the vendor dashboard, you will find the Chat Widgets option there. Click on it, then click on the Create New Widget Option.

Next, you need to click on the Create New Widget Option.

Step 4: Give your widget a name and select Social Channels
Now, give your widget a name and you need to choose the social channels you want to include like WhatsApp, Messenger, Telegram, etc.

Click on Save Changes and Next.
Step 5: Customize your Chat Widgets
You can customize the Chat Widgets as you like. You can place the widget, change color, add animation, select font, ad custom CSS for extra customization.

Step 6: Set triggers
You can also set when the chat widget will be live and also add customized rules for the widget as well.

And you are done. Now you can see the widget on your multi-vendor marketplace.

That is how you can enable chat widgets with WCFM within a couple of minutes.
How to enable Chat Widgets with Dokan
You can easily enable the widgets with Dokan with a few simple steps. Then you can add any kind of social channel you want. Here is the detailed process,
Step 1: Install Chat Widgets
First, go to WP-Admin–> Plugins–> Add New. There type ” Chat Widgets WPPOOL“. Then install and activate the plugin.

Step 2: Install Dokan
Next, you need to install Dokan on your WordPress Dashboard. We are hoping that you have already set up WooCommerce. Again go to WP-Admin–> Plugins–> Add New. There type “Dokan”. Then install and activate the plugin.

If you haven’t set up Dokan you can follow the article from here.
Step 3: Go to the frontend and configure Chat Widgets
Now, if you go to the front end or in the vendor dashboard, you will find the Chat Widgets option there. Click on it, then click on the Create New Widget Option.

Step 4: Give your widget a name and select Social Channels
Now, give your widget a name and you need to choose the social channels you want to include like WhatsApp, Messenger, Telegram, etc.

Click on Save Changes and Next.
Step 5: Customize your Chat Widgets
You can customize the Chat Widgets as you like. You can place the widget, change color, add animation, select font, ad custom CSS for extra customization.

Step 6: Set triggers
You can also set when the widget will be live and also add customized rules for the widget as well.


And you are done. Now you can see the chat widget on your multi-vendor marketplace.
That is how you can enable chat widgets with Dokan within a couple of minutes.
Wrapping up
Chat widgets are the best way for your customer to get acquainted with your business, and rightfully so. It gives the client a direct line of communication with your support agents and lets them feel like they are being taken care of.
Remember that using a chat app will boost your customer retention and increase the trustworthiness of your website.


