Today we are going to show you how to enable chat widgets with Dokan – the best multi-vendor marketplace in minutes.
Implementing a live chat feature in a multivendor marketplace is very important. Because, if you can create a strong relationship with your customers then you can easily increase your conversion rate. However, you need to implement the right channels on your marketplace.
Because that way customers can easily reach you and solve all their queries. Now, you maybe thinking that where can you find this kind of software that will help you add all the social channels on your multi-vendor marketplace right?
Well, the Chat Widgets compatible with Multi-vendor Marketplace can be your solution. With this chat widget, you can give the best customer support and easily gain their trust. And when you can gain their trust, you can increase your sales and generate more leads. This chat widget will also help your support system become more flexible.
The direct click to chat or call now button makes it easy for the customers to choose the channel they are most comfortable with you.
So lets see how it works with Dokan Shall we?
Table of Content
How to Enable Chat Widgets with Dokan, Step by Step Process
You can easily enable chat widgets with Dokan with a few simple steps. Then you can add any kind of social channel you want. Here is the detailed process,
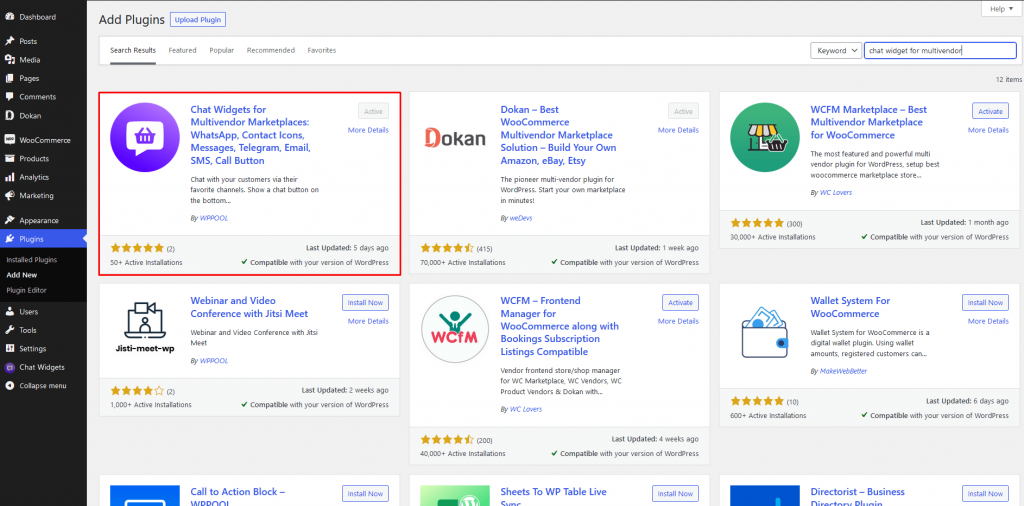
Step 1: Install Chat Widgets Compatible with Multi-vendor Marketplace
At first go to WP-Admin–> Plugins–> Add New. There type ” Chat Widgets Compatible with Multi-vendor Marketplace “. Then install and activate the plugin.
Step 2: Install Dokan
Next, you need to install Dokan on your WordPress Dashboard. We are hoping that you have already setup WooCommerce. Again go to WP-Admin–> Plugins–> Add New. There type “Dokan”. Then install and activate the plugin.
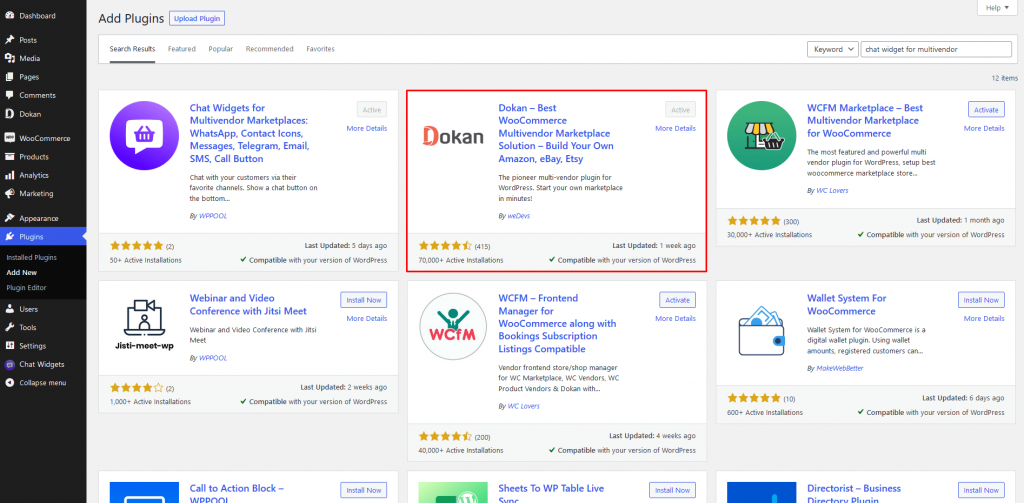
If you haven’t set up Dokan you can follow the article from here.
Step 3: Go to the Frontend and Configure Chat Widgets
Now, if you go to the frontend or in the vendor dashboard, you will find the Chat Widgets option there. Click on it, then click on the Create New Widget Option.

Step 4: Give Your Widget a Name and Select Social Channels
Now, give your widget a name and you need to choose the social channels you want to include like WhatsApp, Messenger, TeleGram, etc.
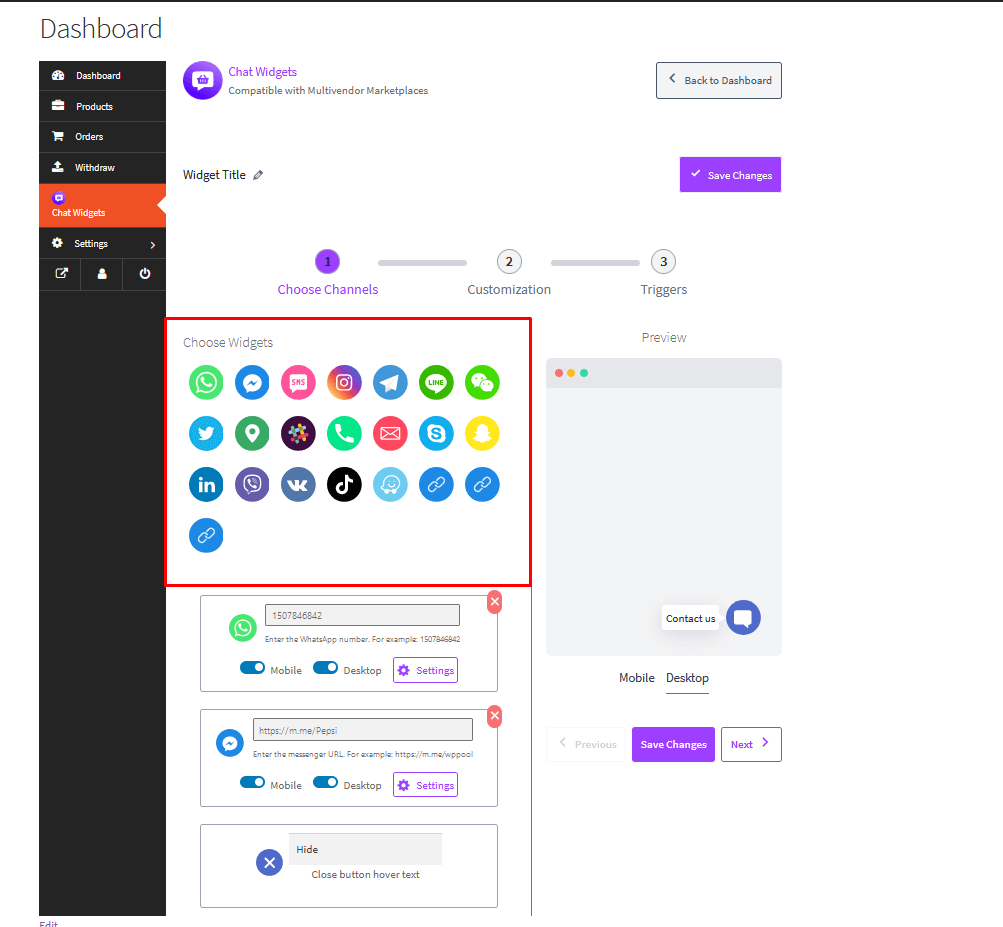
Click on Save Changes and Next.
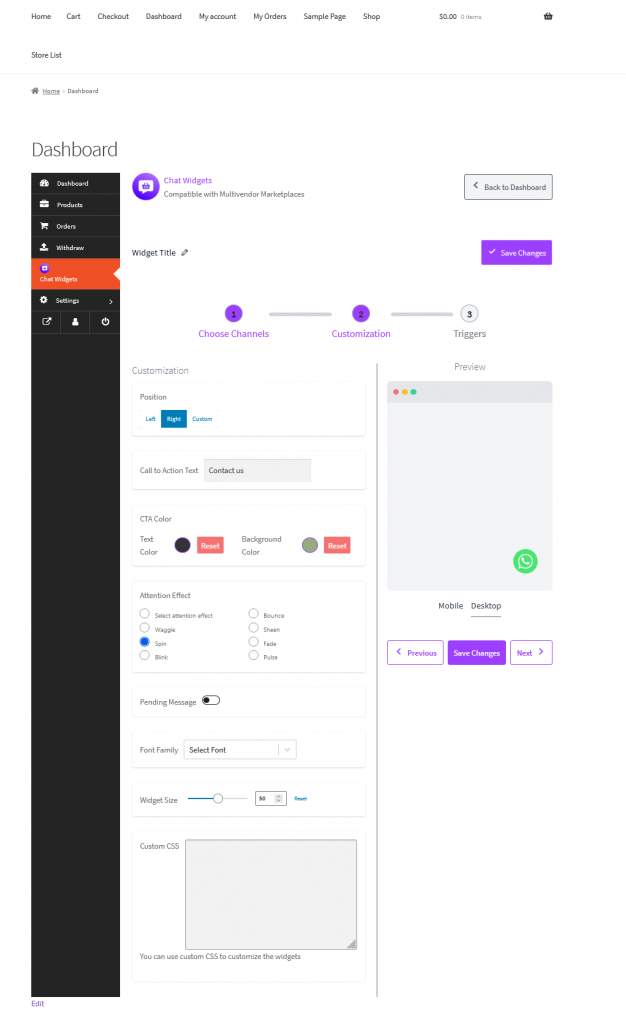
Step 5: Customize Your Chat Widgets
You can customize the Chat Widgets compatible with Multi-vendor marketplaces as you like. You can place the widget, change color, add animation, select font, ad custom CSS for extra customization.
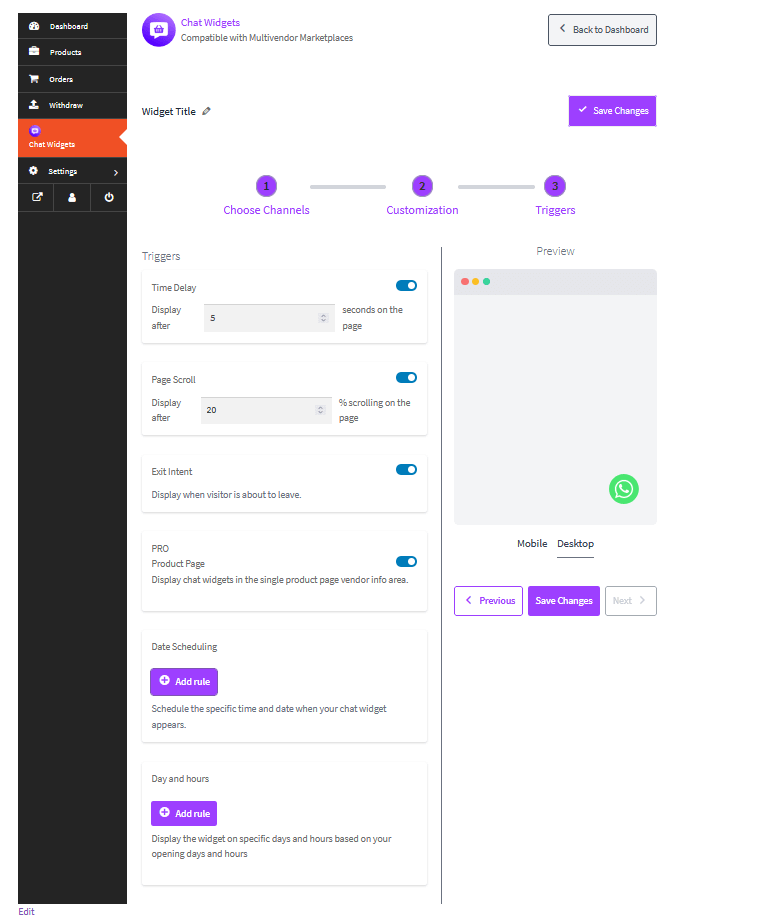
Step 6: Set Triggeres
You can also set when the chat widget will be live and also add customized rules for the widget as well.
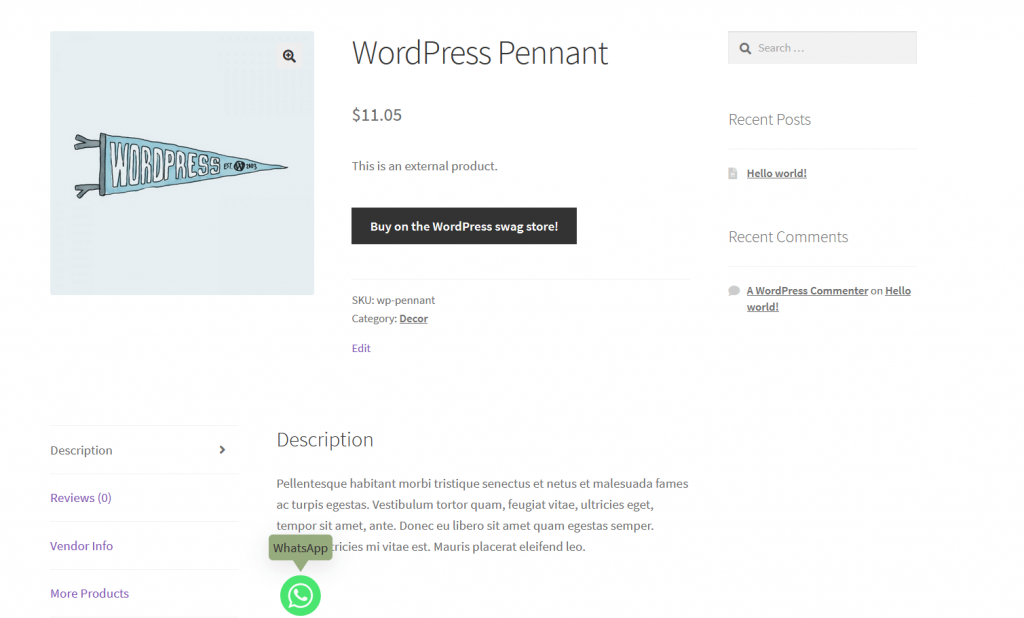
And you are done. Now you can see the chat widget on your multi-vendor marketplace.
And you are done. Now you can see the chat widget on your multi-vendor marketplace.
That is how you can enable chat widgets with Dokan within a couple of minutes.
Conclusion
Now you can easily enable chat widgets with Dokan.
Adding a chat feature will only improve the feasibility of your marketplace. It will also create a great user experience. Because then users will get questions answered quickly. And when they get clear-cut answers it will easily build a sense of trust for your brand.


Add your first comment to this post