With the new Stock Sync with Google Sheet for WooCommerce plugin, you can now manage all your WooCommmerce stock from the google sheet.
Yes, it takes time to manage stocks. Visiting the WooCommerce dashboard and editing each product stock manually every time is super boring and time-consuming. Well not anymore. Using the Stock Sync with Google Sheet for WooCommerce plugin, you can sync all your product data to the google sheet automatically and manage them efficiently from there.
You don’t need to do manual labor anymore. Today we are going to show you the features and usage of this amazing plugin.
Keep reading till the end.
Table of Content
- Stock Sync with Google Sheet for WooCommerce Features
- How to Install and Use the Stock Sync with Google Sheet for WooCommerce
- Conclusion
Stock Sync with Google Sheet for WooCommerce features
Here are the features you will get using the Stock Sync with Google Sheet for WooCommerce plugin,
Easily export products to Google Sheet
You can get all your store products details in one place in an organized way on a simple spreadsheet and sync stock. All you have to do is just activate the plugin, open a Google SpreadSheet, connect the sheet to your site dashboard and follow the steps for exporting all the stock details. Simple, organized, and hassle-free.
Support for variable product
You can also get different rows for variable products of your store. There are no complications in uploading Variable products. You can put different data on the created different rows for your variable products. Manage simple, variable, and group each type of product of your stock in one place.
Update almost everything
You will get not only export data, you can easily update all the stock data from the sheet to your site dashboard. You’ll get edit access to the site dashboard from the sheet both in one place. Edit product name, details, pricing, on-sale updates, product type, stock status, etc. in one go. Managing your store is easier now.
Auto-sync with a two-directional path
Editing the sheet and syncing with the site is not all. Stock Sync for WooCommerce with Google Sheet plugin automatically syncs in a two-directional path. You update your sheet and the site dashboard gets auto-updated. You update details on the site dashboard your Google Sheet gets an automatic update. Stock management is getting simpler.
Manually edit or remove products from the sheet
For maintaining a new product launch in your store or to remove one you’ll not get edit access from the sheet. So, products won’t be overlapped mistakenly which happens on sheet management often. This feature is for managing the store avoiding major mistakes while you’re in rush. For placing or removing any product from your WooCommerce site you’ll need to do it manually from the dashboard, not from the sheet.
One-click manual sync button
Get a backup button for sync data. If anything happens on the Google Sheet unexpectedly like the existence of unnecessary content and If you want to manually sync the products and replace the old data in the sheet with unnecessary content then you can update manually with the new change on the site on your sheet with just one click.
How to install and use the Stock Sync with Google Sheet for WooCommerce
To use the Stock Sync with Google Sheet for WooCommerce plugin, you need to follow the below steps,
Step 1: Install and activate the plugin
Go to your WordPress admin dashboard and navigate to Plugins–> Add New. There type the plugin name, install and activate the plugin.
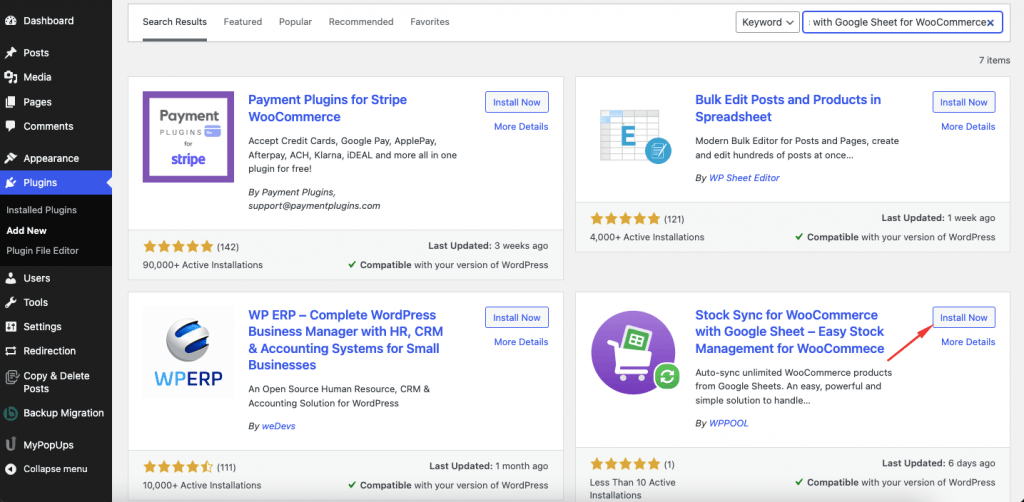
Note that you need to activate the WooCommerce plugin in order use the stock sync with google sheet for WooCommerce plugin.
Step 2: Configure the settings
Now, go to the stock sync with google sheet for WooCommerce dashboard and click on the Get Started button,
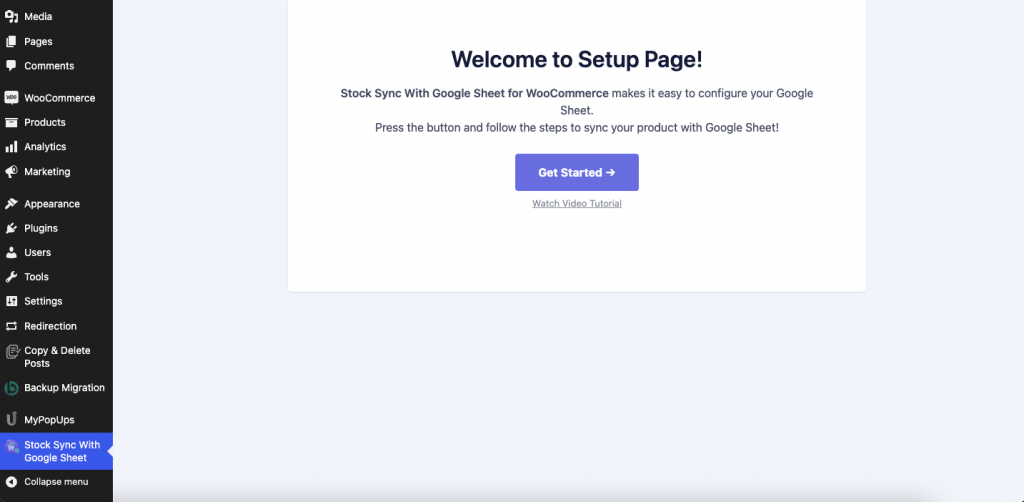
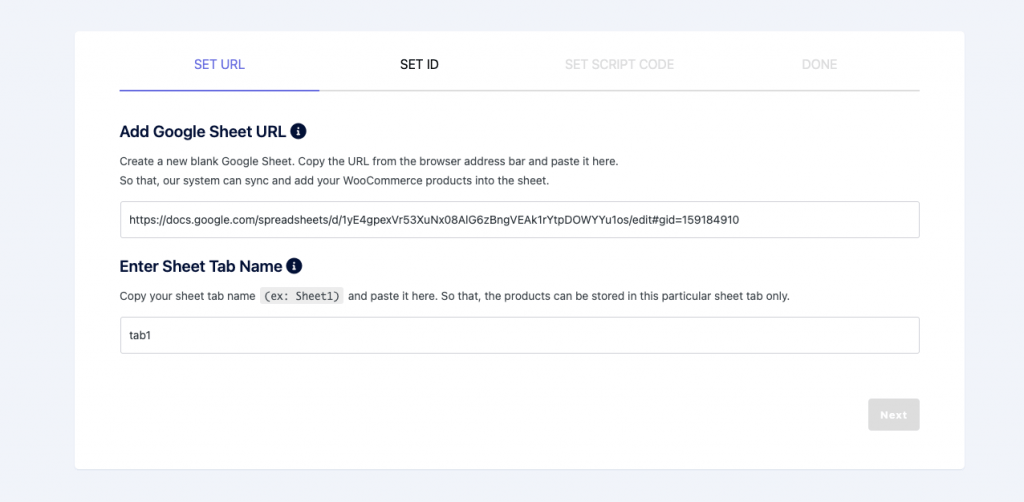
Now, copy the URL link of your Google Spreadsheet where you want to copy your product details,

Paste the URL in the next page and also paste the Tab name of the Google Sheet just like the image below,
Now, copy the ID in the text box to give editor access,
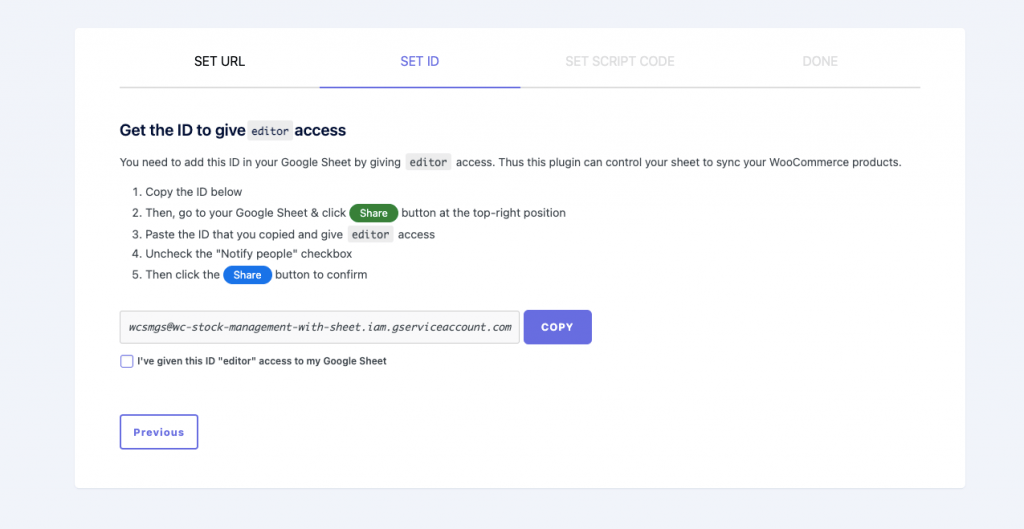
You need to paste the ID in the share section,
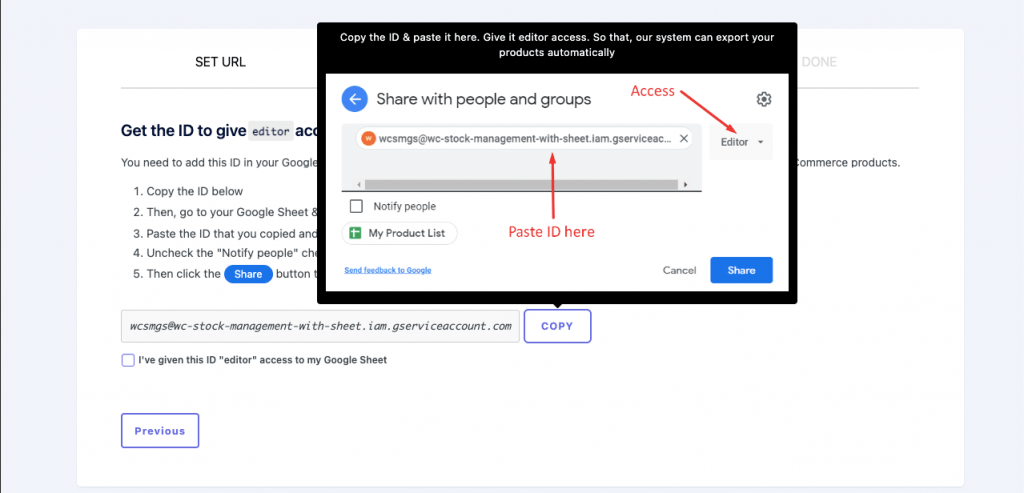
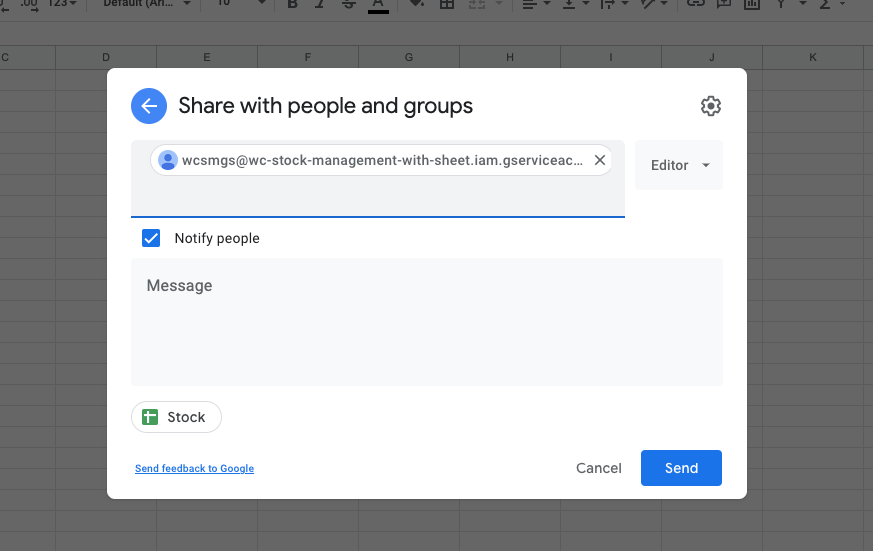
Now, paste the ID on your Google Sheet share section and give the Editor access,
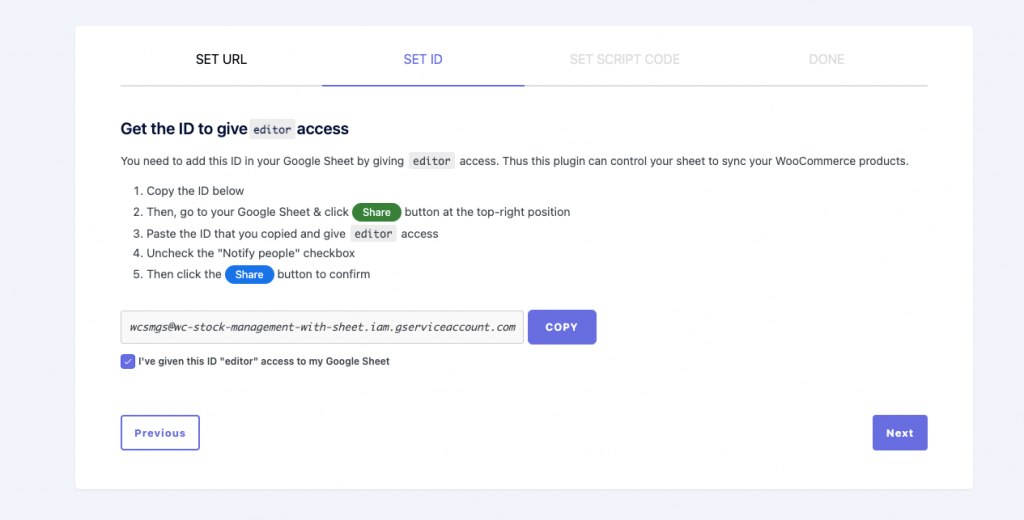
Check the “I’ve given this ID “editor” access option, click on Next,
Step 3: Copy the script
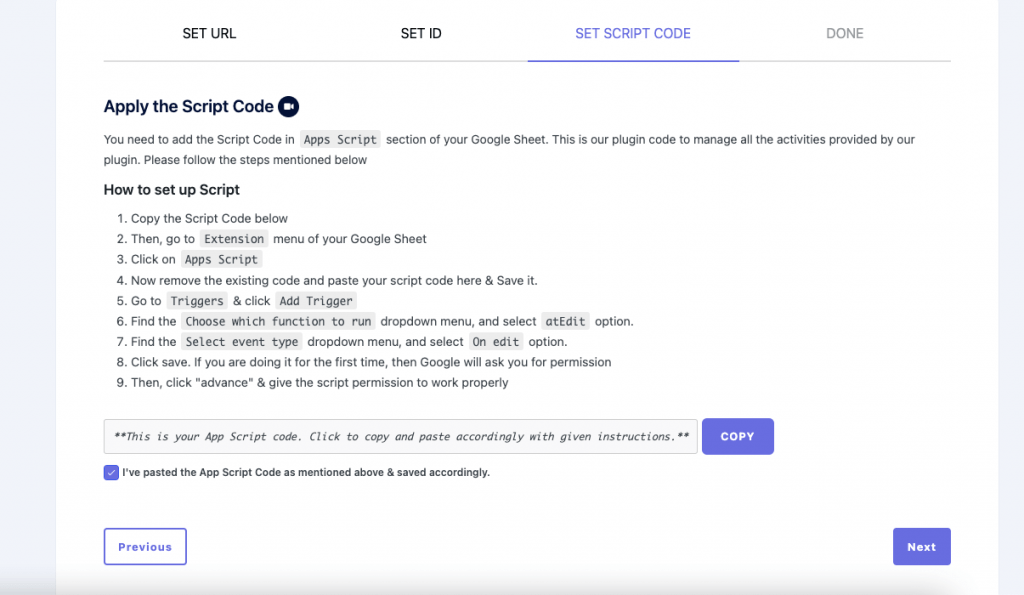
Now, you need to copy the copy the script from the Set Script Code section,
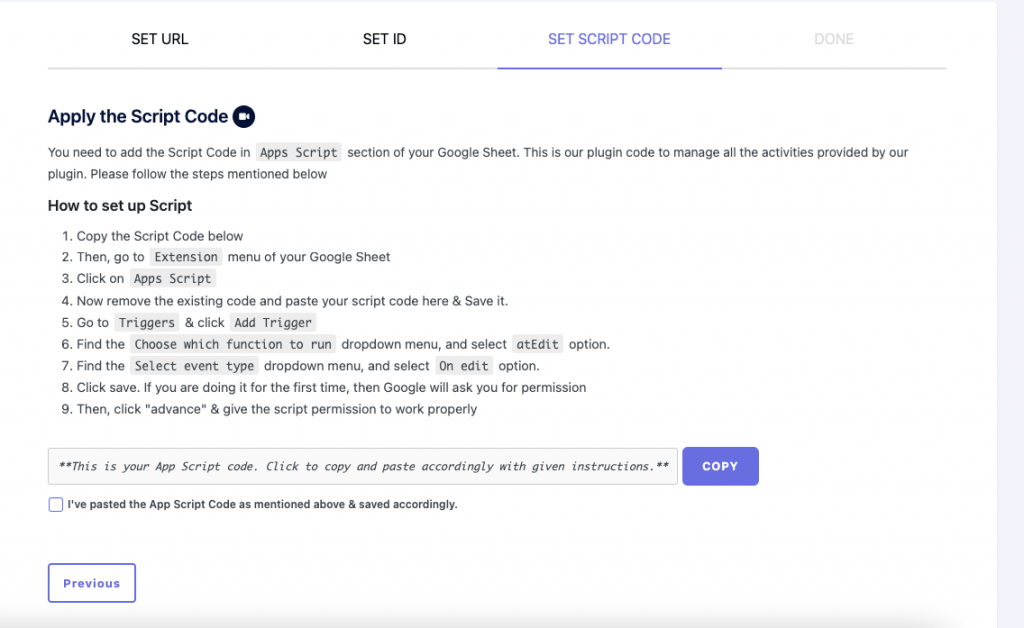
Click on the Extensions button of your Google Sheet and click on the App Scripts,

Paste the code here and save the project,
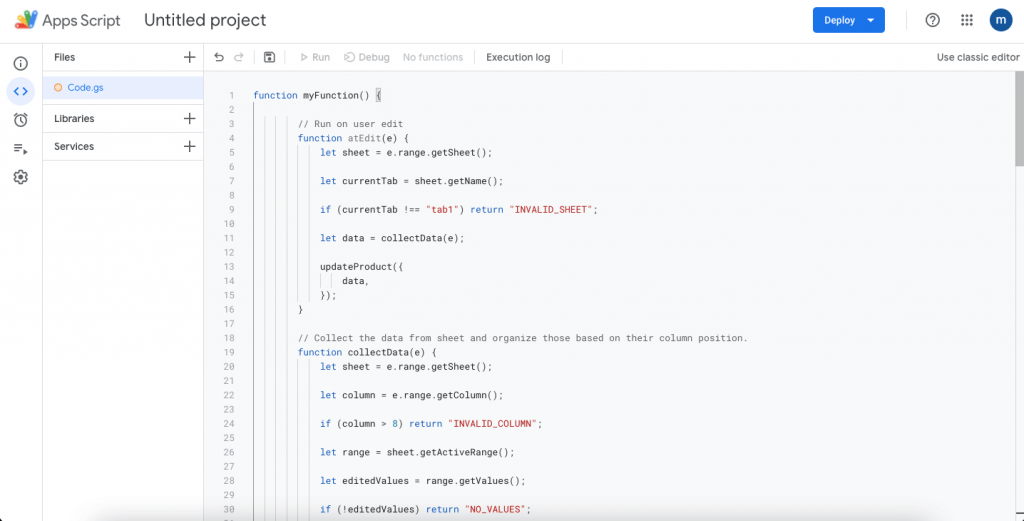
Now you need to add a trigger, click on the Trigger button,

Click on the Add Trigger button, choose my function and on edit option, and save the trigger,
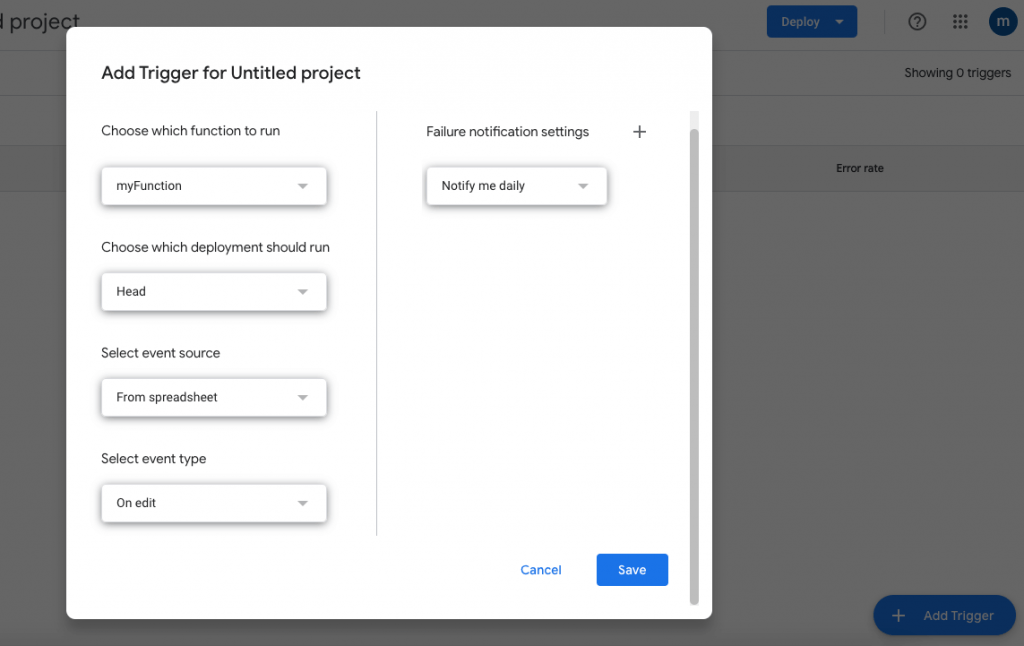
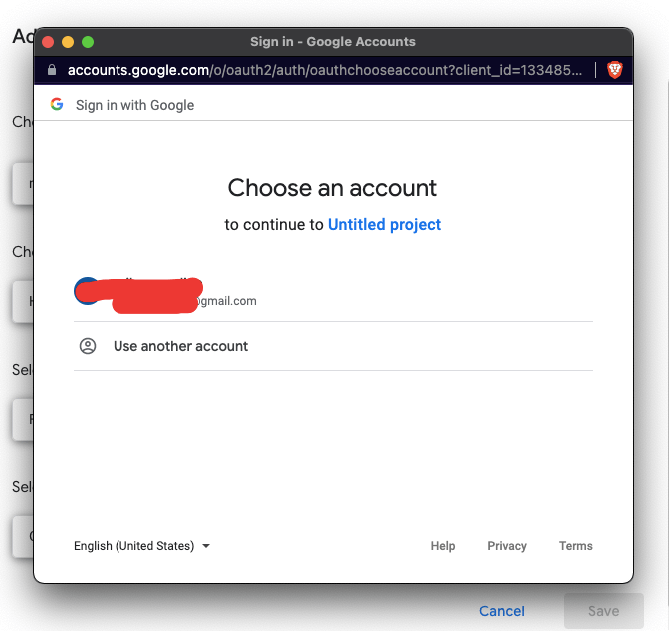
You might have to give some permission to save the trigger.
Choose your account,
Check the checkbox like the image below,
Step 4: Sync with Google Sheet
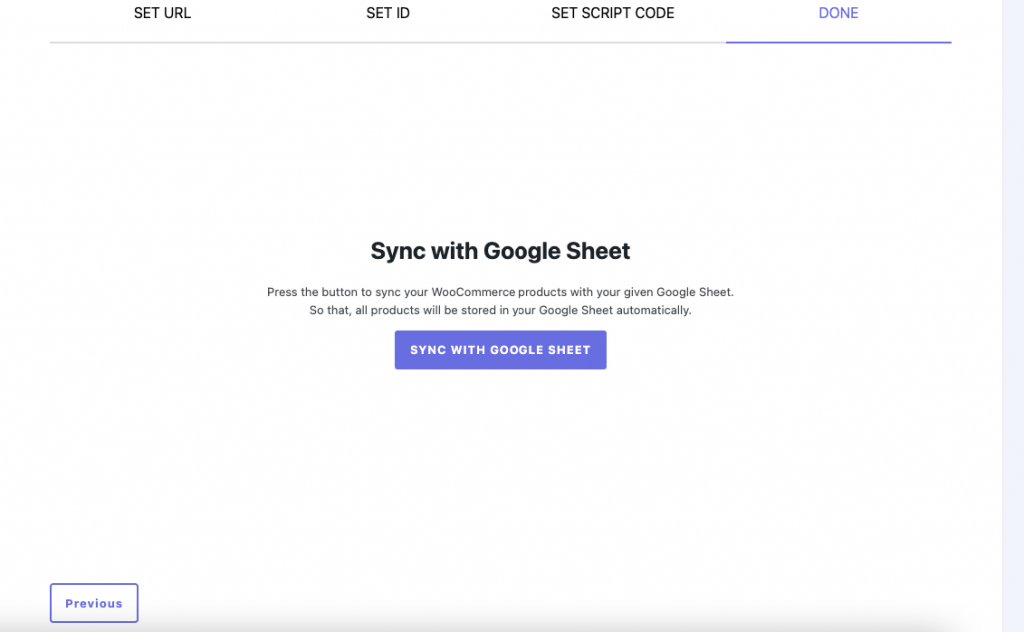
Now, click on the Sync with Google Sheet button,
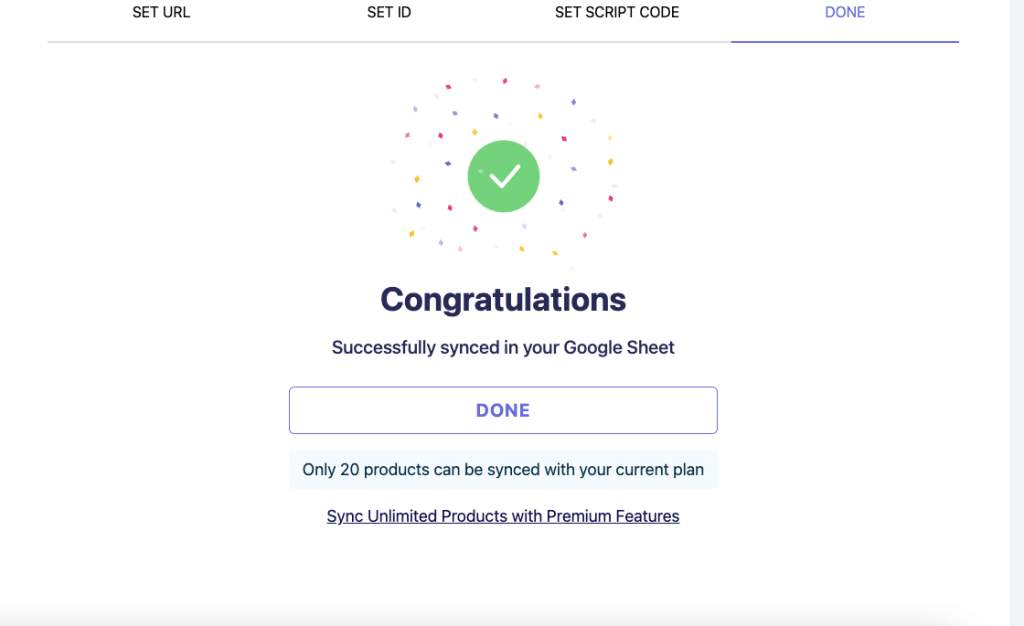
If it is successful, you will get a message,
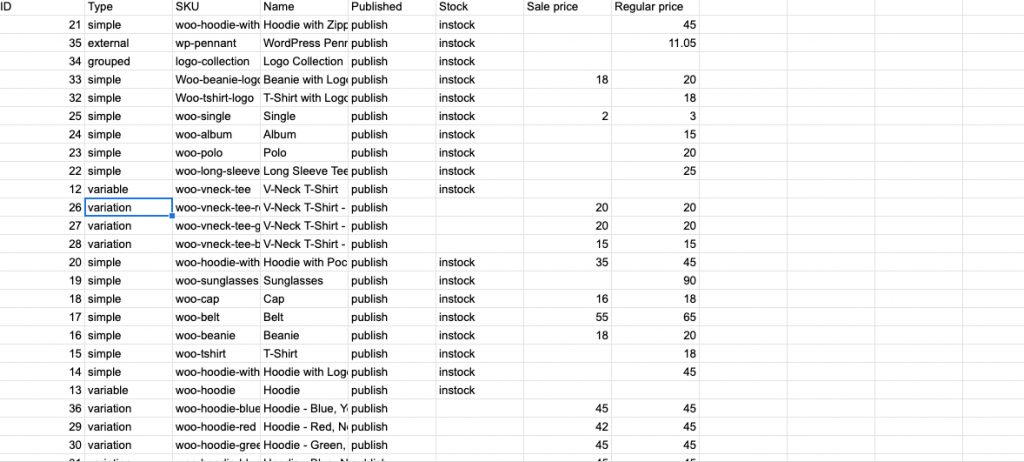
You can see in the spreadsheet that the products are copied,
Conclusion
So, here it is.This is how you can use Stock Sync with Google Sheet for WooCommerce plugin with ease. Now you can manage your stocks quite easily and run your WooCommerce store efficiently as well. If you have any queries do let us know in the comment section.



Add your first comment to this post