The purpose of building a WordPress website can never be fulfilled until it enhances content accessibility for your audience. A powerful way to achieve this is by adding tables for your data-driven or feature-analysis content. Why is this so important?
Because tables on your WordPress site reinforce clear and transparent content presentation, they also induce aesthetics and professionalism in your website’s appearance.
That’s why, in this guide, we’ll give our complete focus on how to add a table to WordPress using the best WP table plugin. So, let’s jump in to establish a smooth user experience for your audience…
Why is Displaying Table Important for Your Site?
Through a table, you can display data-driven insights in an organized and easy-to-understand manner. Also, well-designed tables improve accessibility for users with disabilities. This will redefine the overall user experience and improve user interaction with your site.
Aside from these, there are many advantages of displaying tables on your WordPress site. Let’s have a quick look at the significance of using WP tables:
- Quick comparison: Using tables, you can showcase side-by-side comparisons among competitors. Besides, you can highlight key differences with responsive WordPress tables.
- Better SEO results: Search Engines easily crawl and rank structured data. For versus blogs, search engines put more focus on ranking content presented in a table format. This highly improves the ranking of your content on SERP.
- Transparent data presentation: Nothing is more clear and effective than displaying data through tables. The table promotes transparency while presenting in-depth data analytics.
- Fast data capture: Users can adopt data more swiftly that is displayed on a table rather than a paragraph. This easily helps users process and memorize a set of data in less time.
- Clean website design: Gathering lots of data in a paragraph is hard to read and understand. Whereas, tables ensure your website appearance remains clean and friendly.
- Professional and credible appearance: A well-structured table contributes to building professional sites that hold strong credibility. It means you have given generous time and effort to organizing content.
How to Add a Table to WordPress in 3 Steps
WordPress has a table block for adding tables to your site. However, this Table block is not as customizable as a table plugin. Besides, these WordPress table plugins let you control your table’s appearance on different devices. That’s why due to their boundless customization options, adding tables using a plugin is more appropriate. So let’s learn how to add a table to WordPress that is responsive, using a table plugin:
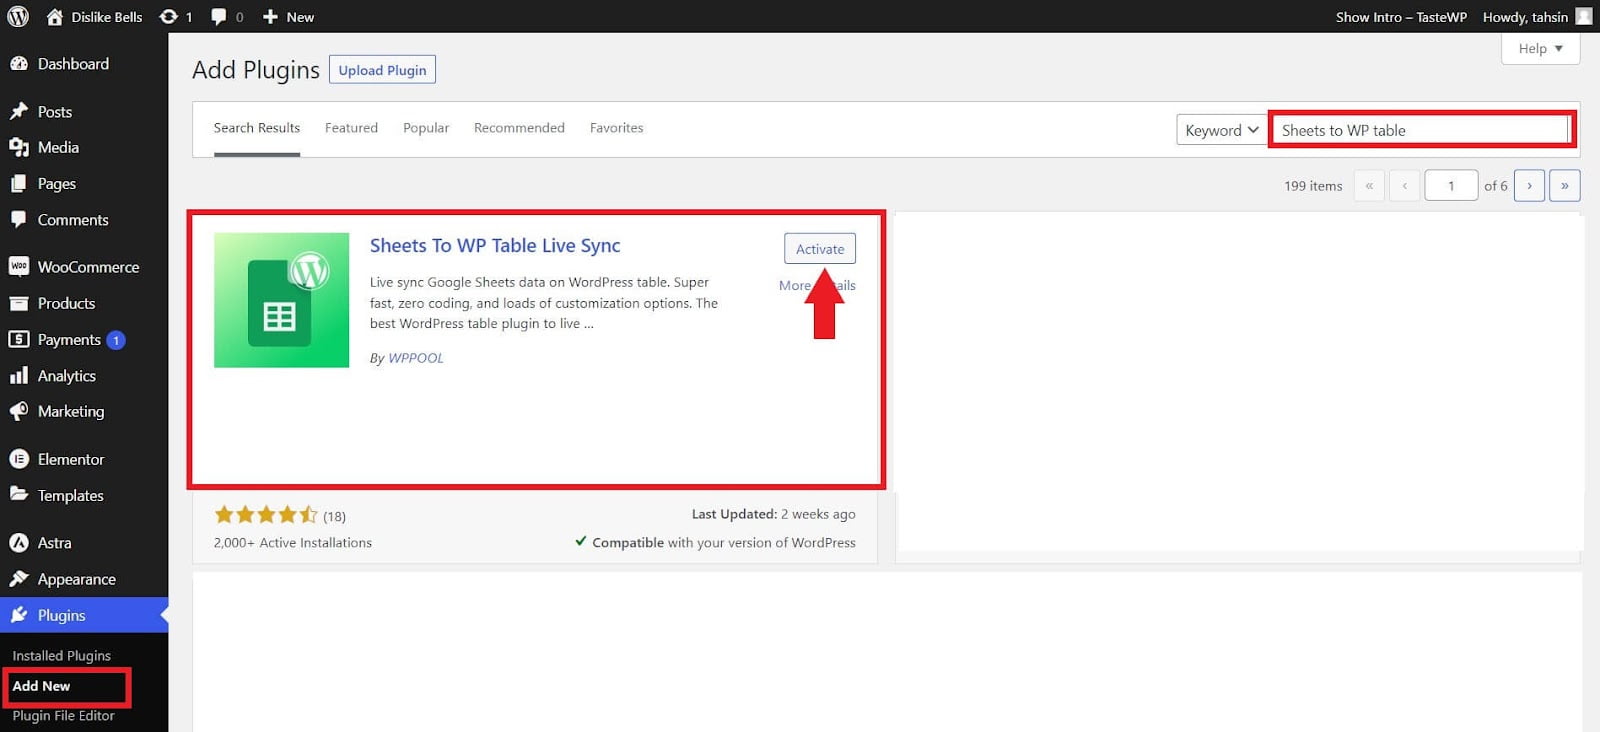
Step 1: Install a WordPress Table Plugin.
To add a table to WordPress sites, you must install a WP table plugin. Here we’ll use the Sheets to WP Table Live Sync plugin to import your Google Sheets table to your WordPress site. The reason is it offers a pretty simple interface and integration with Google Sheets.
So, to add this plugin, you have to navigate to Plugins >> Add New Plugin and look for it in the search bar. After seeing it, hit the “Install Now” button. Then, activate the Sheets to WP Table Live Sync plugin afterward.
Step 2: Create a New Table
In this step, you need to add a table by visiting Sheets to Table >> Dashboard. Now, press the “Create new table +” button.

Now enter the URL of Google Sheets where you have a table drafted for your site. After inserting the url, press the “Create table” button to add a table to WordPress.

Next, you have to add the table title and description in the following fields marked in the image. From here, you can also copy shortcodes and add the table to any page or post. After inserting this information, press the “Next” button.
Step 3: Configure Your New Table

This will redirect you to the theme selection tab for your table. You will get two options for customizing the appearance of your WP table. One is importing color and text style from the sheet and another is selecting a theme for your table.
If you prefer to import color and text styles from Google Sheets, enable the “Import color and text styles from sheet” option. Or else select a theme from the free and pro themes if you want to create a customized table appearance using a theme. One thing to note is that you can’t make use of these two options at a time. So, keep the first option disabled, if you want to use a theme. After that, press the “Next” button.

After adopting a theme for your table, customize your WP table by changing the layout, Utility, and Styling. After customizing and adding a table in WordPress, hit the “Next” button.

Now, it will redirect you to a tab from where you can hide rows/columns for desktop and mobile devices. Besides, you can also hide the cells of your table. To hide a selective row, column, or cell, navigate to the respective tab and click on the row, column, or cell that you want to hide. Then, enable the “Same as desktop” option if you want the same changes for both devices.
Finally, press the “Fetch & Save” button to add a responsive table to your WordPress site.

Enjoy the Out-of-Box Customization with the Advanced WP Table Plugin
Sheets to WP Table Live Sync is effective for enjoying boundless customization options that the default WordPress Table block fails to provide. Its pro version is even more beneficial for letting you do the following customizations:
- Instantly import color and text styles from Google Sheets.
- Customize appearance with diverse premium themes for your WP table.
- Let users export tables in different formats including Excel, JSON, PDF, CSV, etc.
- Copy and print table to establish smooth WP table migration.
- Give you access to control cursor behavior.
- Hide rows, columns, and cells from the table, separately for desktop and mobile view.
FAQ
Can You Add a Table to WordPress Without a Plugin?
Yes, adding tables is possible without using WordPress plugins. There are two ways such as through coding and utilizing WP Table blocks. Here the easiest method is using a Table block that takes less than a few minutes to insert a table in WordPress.
Does WordPress Support Importing Tables?
WordPress supports importing table data using third-party tools. However, the default WordPress doesn’t facilitate data importing. You need to rely on tools like Sheets to WP Table Live Sync plugin for such functionality.
Can You Print Tables from WordPress Sites?
You can easily print WP tables. There are a handful of table plugins in WordPress. You can use any of those table plugins that allow you to print tables directly from your site.
Which is the Free WordPress Table Plugin?
WordPress is well-known for its free plugin and theme solution. You will get multiple plugins for each functionality. Here one such free tool for adding WP tables is the Sheets to WP Table Live Sync plugin. Using this solution, you can effortlessly display tables on your WordPress sites.
Can You Export Tables from Your WordPress Site?
Yes, you can export tables from your WordPress site in different formats. Although, this depends on the tool you use. For example, if you use the “Sheets to WP Table Live Sync” plugin then, you can export your created WP tables in Excel, JSON, PDF, and CSV files.
Organize Content with WP Tables
Adding tables to your WordPress site is more than a systematic way of displaying data-driven content. It goes beyond accessible data presentation by allowing the audience to find the information while spending minimal time and effort.
Following the above guide, you can display completely customized WordPress tables in minutes that are visually appealing and highly accessible. Over and above, we’ve used the best table plugin for WordPress named “Sheets to WP Table Live Sync” to unlock the seamless table customization options.
So, get started with this step-by-step guide and organize your data-driven content through responsive WordPress tables in less time.

Add your first comment to this post