Live chat is an important part of any website. If you want to create a healthy relationship with your customers then you need to install a multivendor live chat plugin on your eCommerce site. However, installing a multivendor live chat plugin may become costly in some cases. But not if you are using a WordPress site. Because we are proud to announce the new chat widget for WordPress “Chat Widgets for Multivendor Marketplaces”.
With this chat widget, you can give the best customer support and easily gain their trust. And when you can gain their trust, you can increase your sales and generate more leads. This chat widget will also help your support system become more flexible.
The direct click to chat or call now button makes it easy for the customers to choose the channel they are most comfortable with you. This will have a huge impact on your brand image and revenue generation.
And we are happy that we have developed this chat widget for WordPress sites that support multivendor marketplaces built with any popular plugin like Dokan, WCFM, WC Vendors, etc.
Let’s get to know this plugin, shall we?
Table of Content
Features of Chat Widgets for Multivendor Marketplaces
90% of customers take only 8-10 seconds to decide whether to explore/buy your product or not.
So, the multivendor live chat plugin really helps you to grab that opportunity within those 8-10 seconds. Our chat widget for WordPress multivendor sites will do exactly that. Yes, it has all the necessary features to make your live chat look attractive and smooth. It has features like,
- You can show up to 2 different chat to channels at a time.
- Select the location of the widget (bottom left/right).

- Select triggers as when the chat widget should appear. You can show it after a few seconds, on the page scroll, or use the exit intent trigger.
- Choose from amazing attention effects including bounce, waggle, sheen, and spin, fade, blink, pulse. Your attention effect will help you capture the attention of your website visitors and increase the conversion rate.
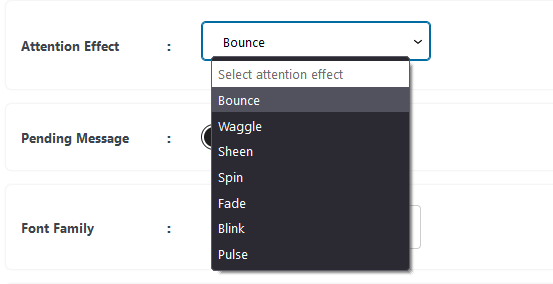
- The pending message icon will let your user know that you’re waiting for them to contact you.
- Fully customize all chat icons including colors and text on hover and chat buttons opacity.
- You will get different button designs
- In the pro version, you will be able to show all 19 channels
- For widget customization in the pro version, you can choose a background color, change the size of your widget, choose from different widget designs or upload your own.
- Change each channel’s background color, upload your own icon, and set the position of the chat widget wherever you want. It’s a pro feature.
- Schedule the specific time and date when your chat widget appears. This will make it easy for you to run time-limited offers, or start a promotional campaign from a specific date. It’s a pro feature.
- Display the widget whenever you want, depending on your business hours and opening days. It’s a pro feature
- Style your chat widget icon the way you want with the custom CSS feature.
- And more.
Now you know the amazing features of the chat widget for the multivendor marketplaces, let’s see how you can install and use this plugin.
Install Chat Widgets for WordPress Multivendor Marketplace
Within a few steps, you can easily install and use this plugin on your multivendor marketplace site. Here are the steps:
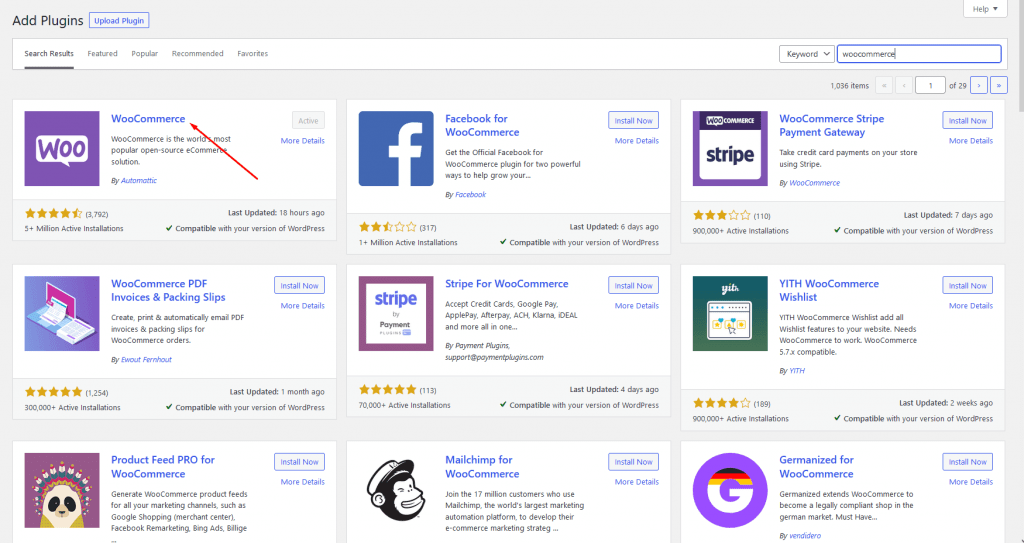
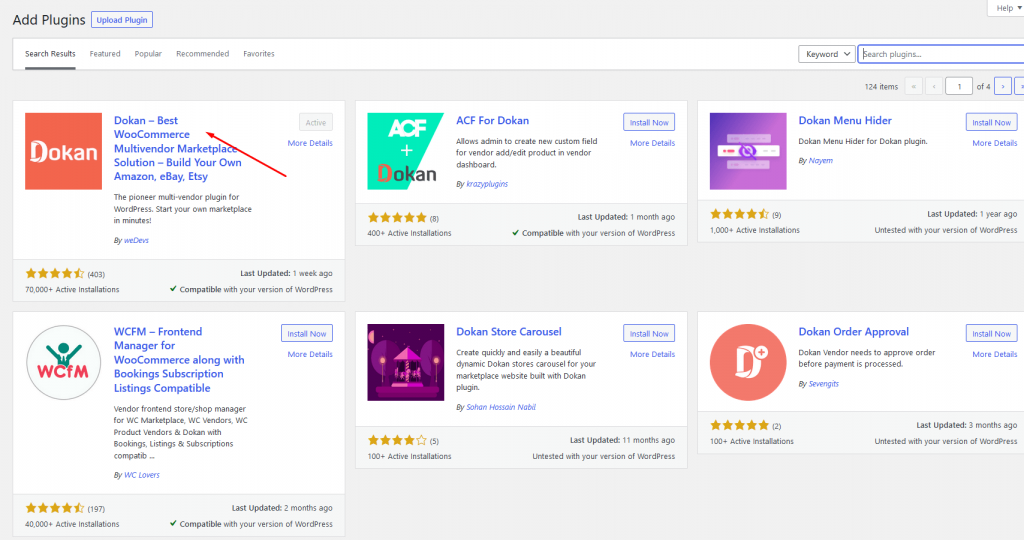
Step 1: Install WooCommerce and Dokan ( or any other multivendor marketplace plugin)
At first, you have to set up your WooCommerce store. If you have already set up your marketplace then you can skip this step.
Just navigate to WP-Admin–> Plugins–> Add New. Type WooCommerce and Dokan, and install the plugins.
Step 2: Install Chat Widgets for Multivendor Marketplaces
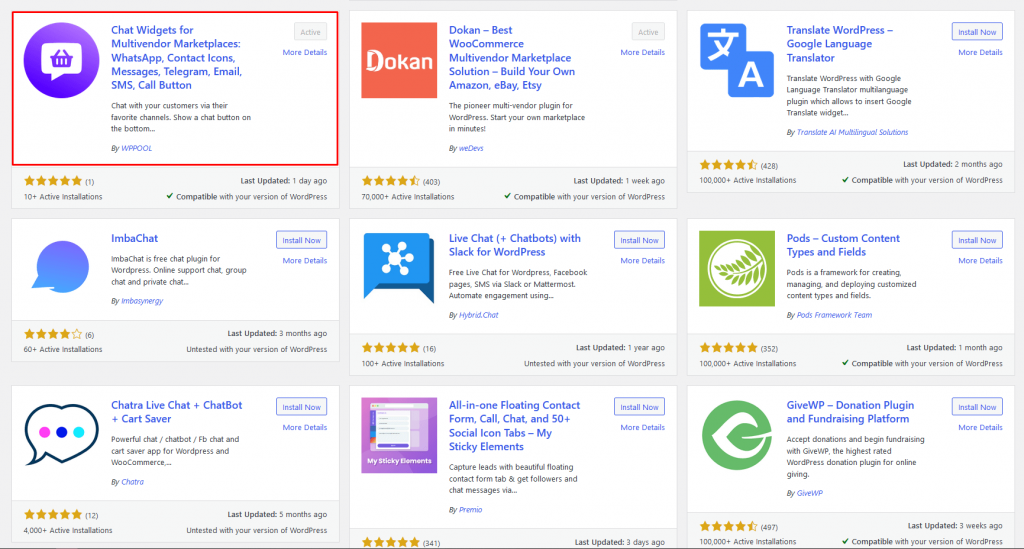
Now is the main step. Go to WP-Admin–> Plugins–> Add New, there chat widget. You will find the chat widget. Install the widget and activate it.
Step 3: Setup Chat Widgets for Multivendor Marketplaces
Now you need to set up the plugin. You can set up the widget from the backend or from the dashboard. The settings are the same for both.
We will show you from the front end.
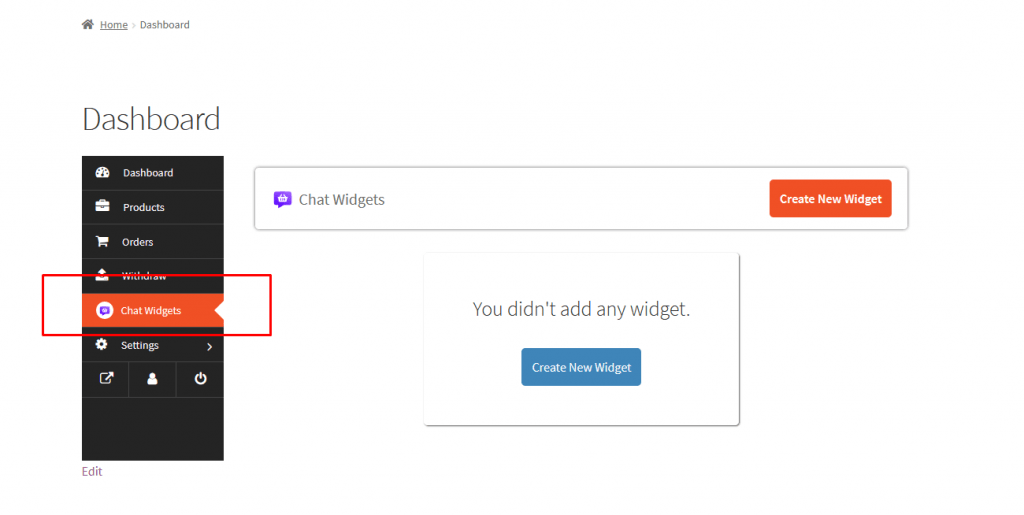
On the vendor dashboard, you will see the Chat Widget option in the menu. Click on it and hit the Create New Widget button.
Now, give your chat widget a name, select the channels. If you enable the preview option, you will be able to see the changes.
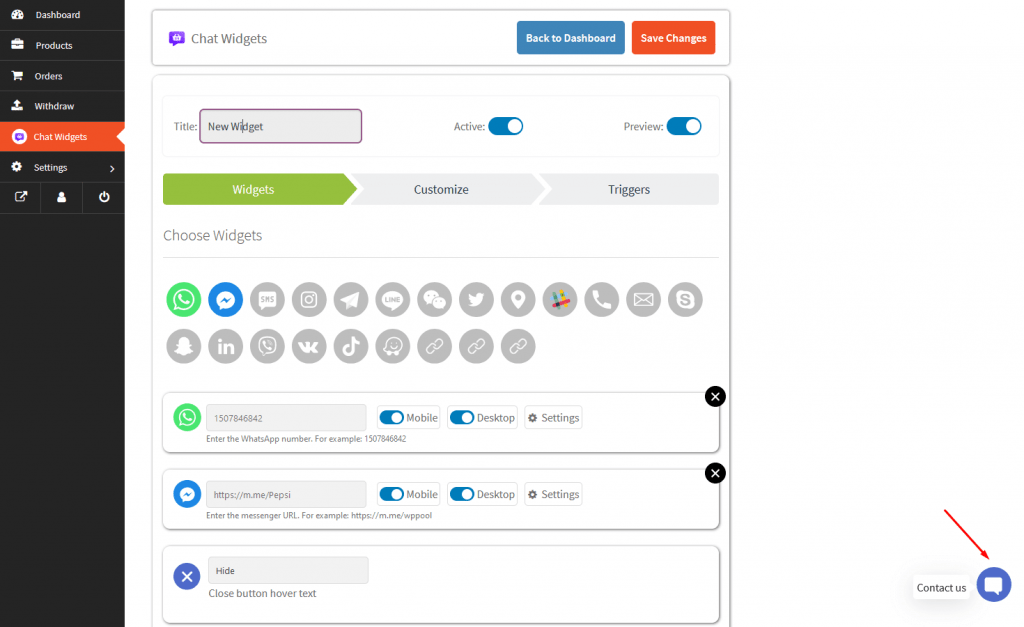
You can also change the icon of the button, hover text, or customize the icon with other icons. Just click the Settings option beside the button.

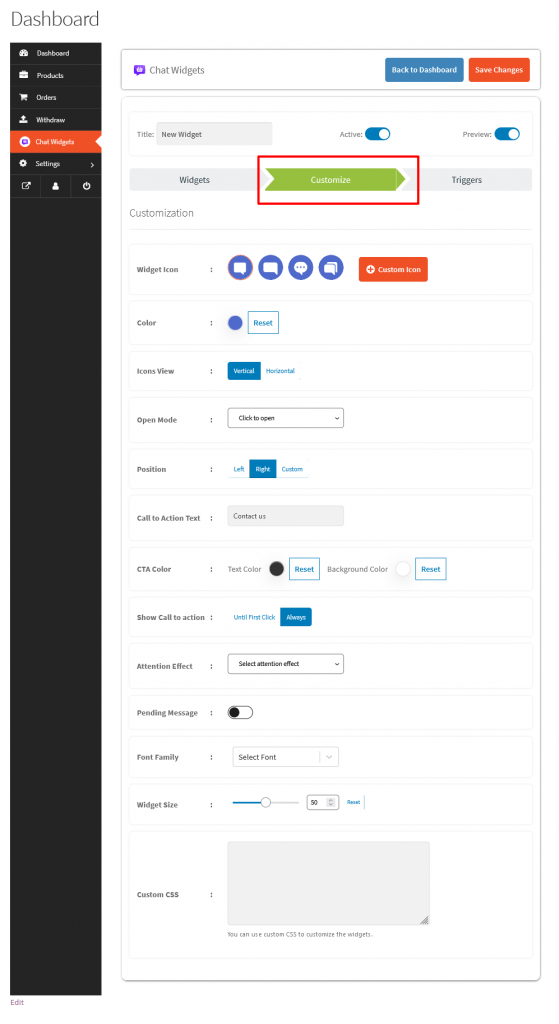
In the Customize option, you can customize the icon, choose a position, customize the call to action text, change CTA color, pending message, and many other options.
In the Trigger section, you can add Time Delay, Page Scroll, Enable Exit intent pop-up, Date Scheduling, Day and Hours

Step 4: Save and Start Using Chat Widget on Your Marketplace
After customizing your chat widget, Save the settings and you can use this plugin on your multi-vendor site.
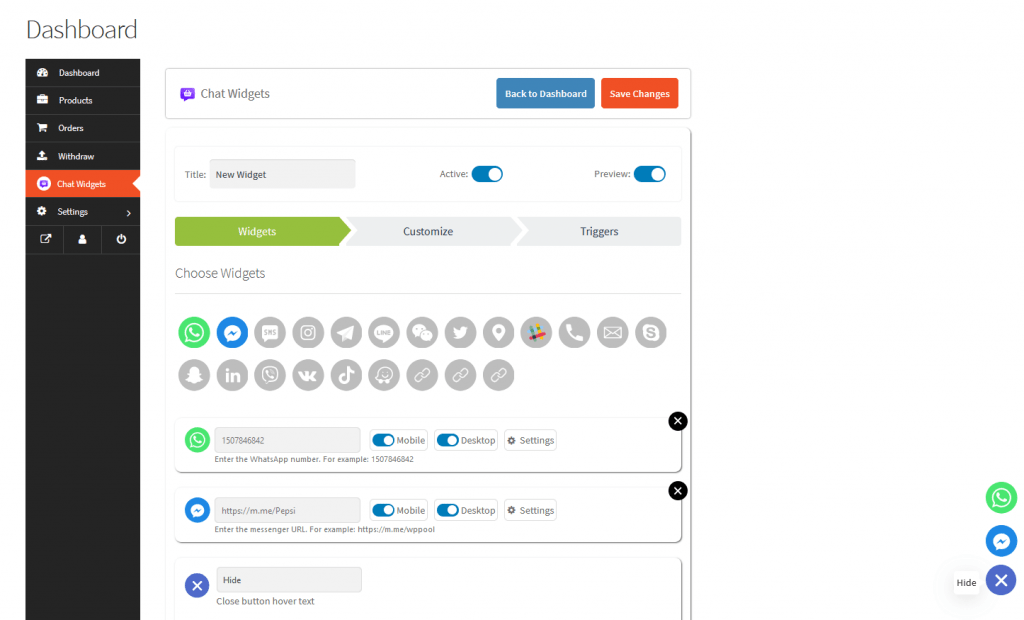
This is how you can easily set up Chat Widgets for Multivendor Marketplaces on your multivendor website.
Conclusion
The main goal of Chat Widgets for Multivendor Marketplaces is about offering excellent customer service.
You can easily stay in touch with your customers through every step of their journey with your eCommerce site. Chat widget allows you to create a bond of trust between you and your customers. This eventually increases sales and makes the customer always come back to you again and again.




Add your first comment to this post