After the historic year of 2020, the way we used to manage office has changed. Now, when we think of an office, we don’t only think about a space where everyone is working together. And it has been possible because of plugins like Jitsi Meet, one of the best video conferencing plugins.
And today we are going to show you how to do live streaming in webinars and video conferences using this plugin.
After 2020, the number of webinars has increased. People are using this platform to tell the audience about their product, show different features, and promote their company.
Live streaming is a very important aspect of webinars and video conferences. It gives a chance to the audience to take part in the discussion as well. But sometimes it is very hard to manage live streaming because of a lack of proper tools.
Jitsi Meet will solve that problem. Its live streaming feature can help to manage live streaming quite easily.
We will show you how to do live streaming using Jitsi Meet so you can apply on your next webinars as well.
How to do live streaming in Jitsi Meet
Step 1: Create a new meeting from Jitsi Meet plugin
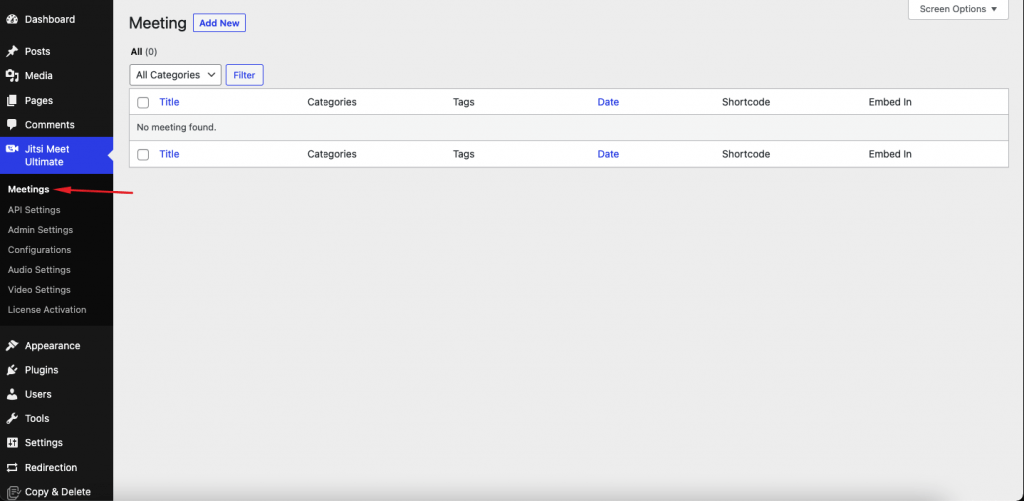
Go to your dashboard and click on the menu item ‘Jitsi Meet Pro’> Meetings.
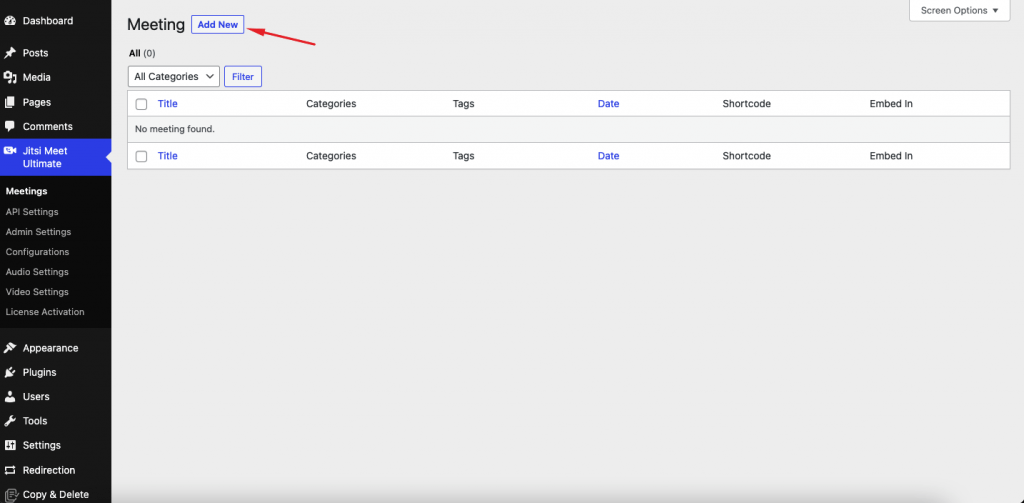
Then create ‘add new’ meeting and open the page.
Step 2: Configure meeting settings
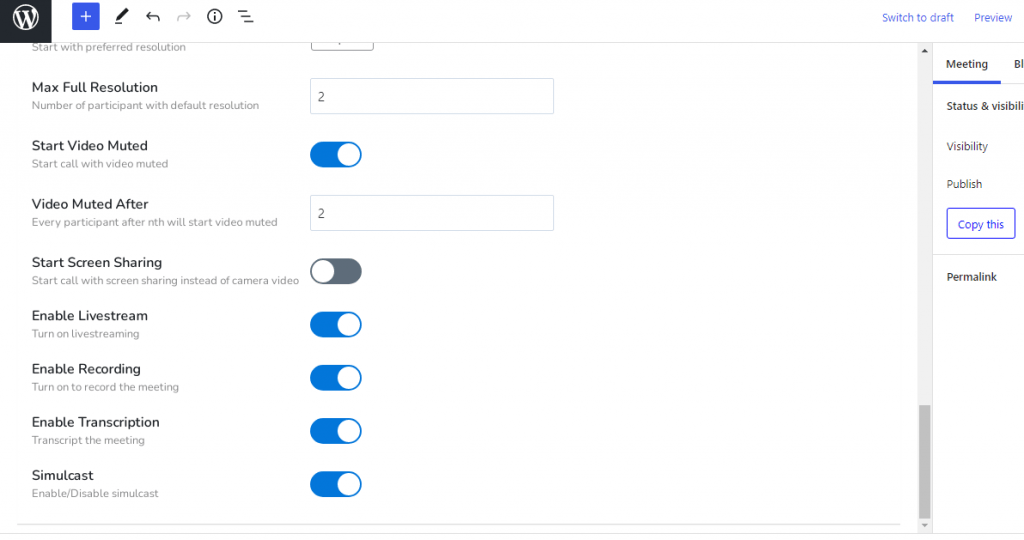
Now go to the meeting setting and turn on the switches. Here are the options you need to use,
- “Enable Livestream” – It is Mandatory for Live streaming
- “Enable Recording” – For Recording
- “Enable Transcription”
- “Simulcast” here
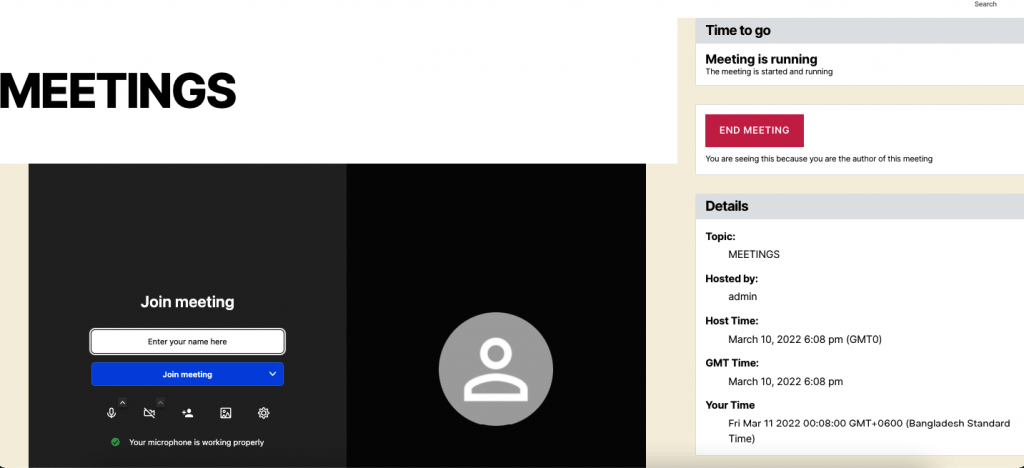
Click on the ‘Publish’ button and view the meeting page.
Step 3: Configure YouTube settings
Then go to the page where you want to play a live stream like YouTube. Go to your YouTube account and create & set up a live streaming setting and go to live. Follow the below image,

Then set stream information like the below,
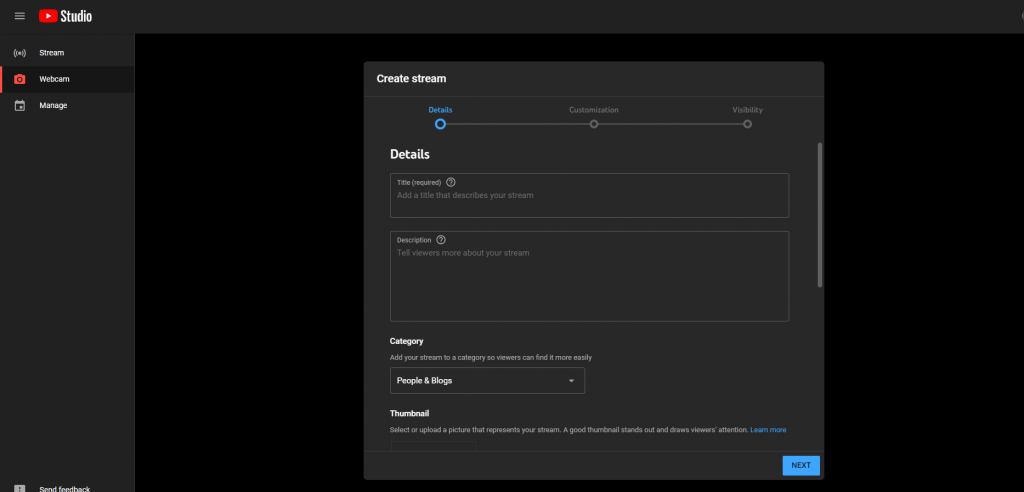
Then you need to go live.
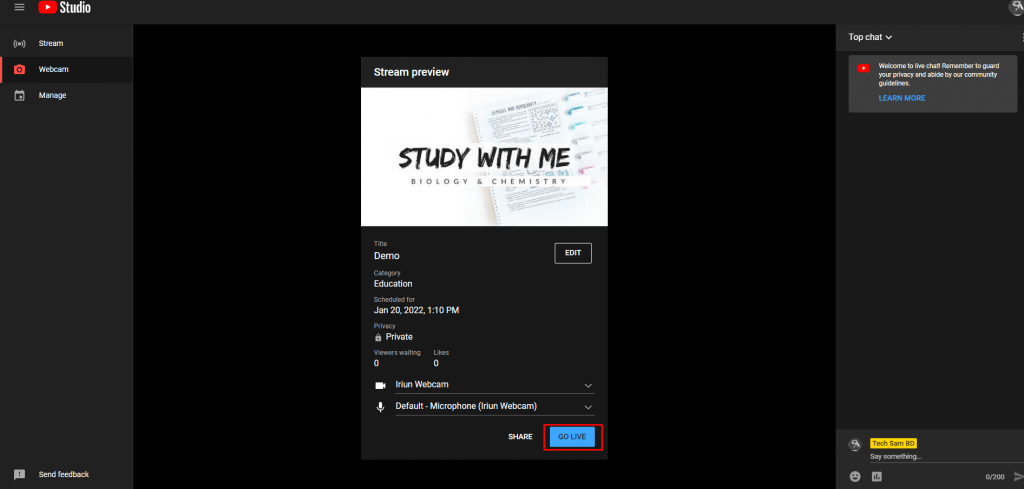
Fill up the details here.
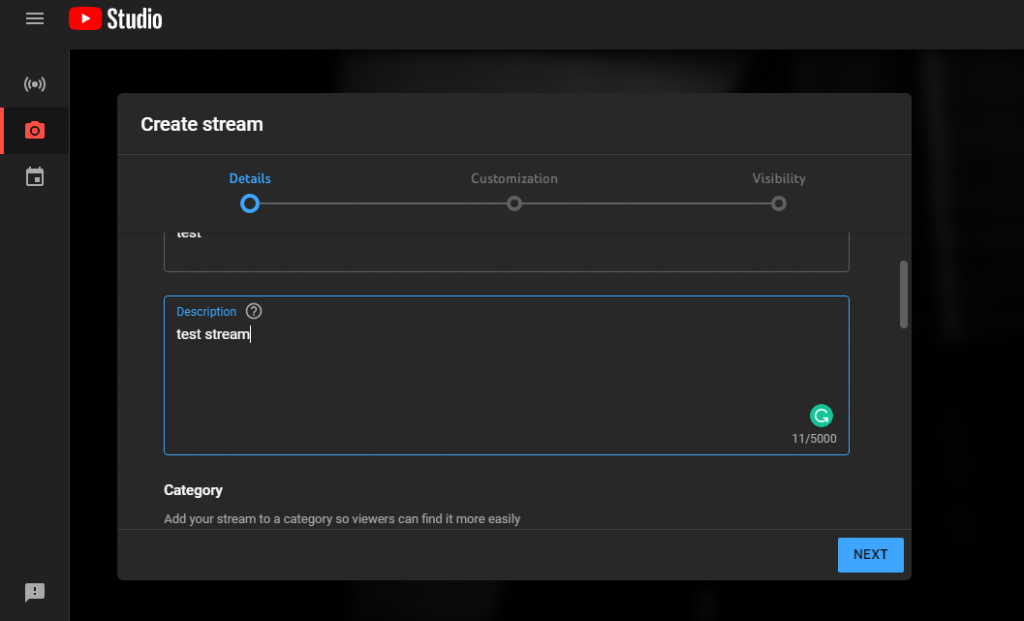
Step 4: Finalize the streaming settings from Jitsi Meet
Then back to our own streaming panel and from the options.
And the go-to again option and select ‘Start live stream’ choose a steam option and put the key and hit the ‘start live stream. And watch the streaming from YouTube. That’s it.

Choose a live steaming by title.

This is how you can do live streamings for your webinars using the Jitsi Meet plugin.
There are more amazing features you can achieve with this plugin. For instance,
- Share presentations and collaborative meetings
- Great for starting an online course business
- Amazing for teleworking or telecommuting
- Organize meeting at any time (Outside of office hours)
- Improve business functionality
- Access numerous people simultaneously
- Bind all workers through a single software.
Conclusion
There are not many best WordPress video conferencing plugins in the WordPress repo that you can compare to the Jitsi Meet plugin. And with this amazing live streaming feature, it will leave behind the competition in no time.
And after reading this article, hopefully, you now know how to do live streaming for your webinars and video conferences easily.
If you face any problems, do let us know in the comment section.



Add your first comment to this post