Recently we received some complaints about the stock sync feature of our Stock Sync for WooCommerce with Google Sheet plugin. Thanks to the patience of our lovely community, we’ve figured out the issue and are now ready to meet your daily eCommerce inventory management needs. Keep reading this blog to learn about the issue, how we’ve solved it and how to get started with the updated version.
Table of Content
- Overview
- What went wrong?
- How did we solve the issue?
- Get started with fast and reliable stock management
- Conclusion
Overview
After the tremendous success of Sheets to WP Table live Sync, our users were demanding a plugin that will ensure swift WooCommerce inventory control. We loved this concept and that’s how the journey of Stock Sync for WooCommerce began. After months of development, we were finally ready. It was time to deliver what our users have longed for quite some time.
With the plugin’s initial launch, We received a tremendous response from the WordPress community. Our speculations came true – the community was searching for a reliable WooCommerce stock manager. Unfortunately, then we faced a rough start.
What went wrong?
The previous version of our plugin was using Google Apps Script, which is a JavaScript platform from Google that allows users to automate Google products. The Apps Script has a limitation of receiving 300 requests/day. So our users were facing the “server busy” issue when they were trying to import more than 300 products at once which is higher than the daily limit.
How did we solve the issue?
Thanks to our extremely talented group of developers, the server busy issue is fully fixed now. We’ve now switched to the Google Cloud Platform to generate your service account which will allow you to reliably sync as many products as you want (on the Ultimate version).
Get started with fast and reliable stock management
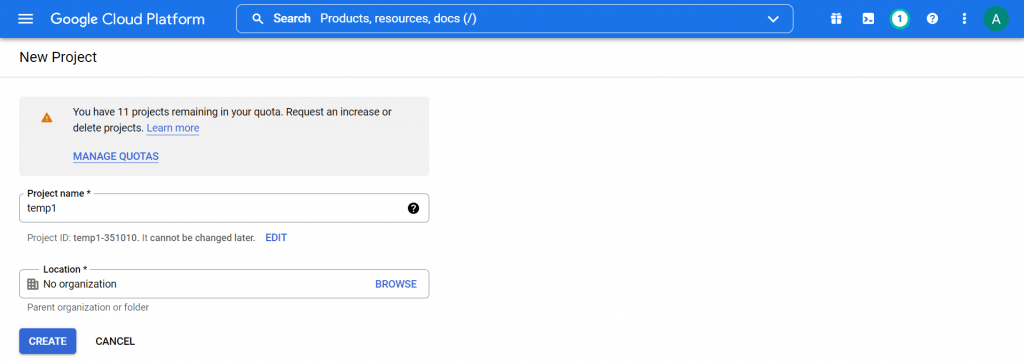
First of all, install and activate the plugin. Then from the WordPress dashboard, select the plugin and get started with the setup wizard. The setup page will redirect you to the Google Cloud Platform, where you’ll be required to create a project.
Once you’ve created a project, navigate to Create Credentials -> Service account. Here add your preferred service account name and click on Create and Continue. Finally, click on Confirm to grant access to your service account.
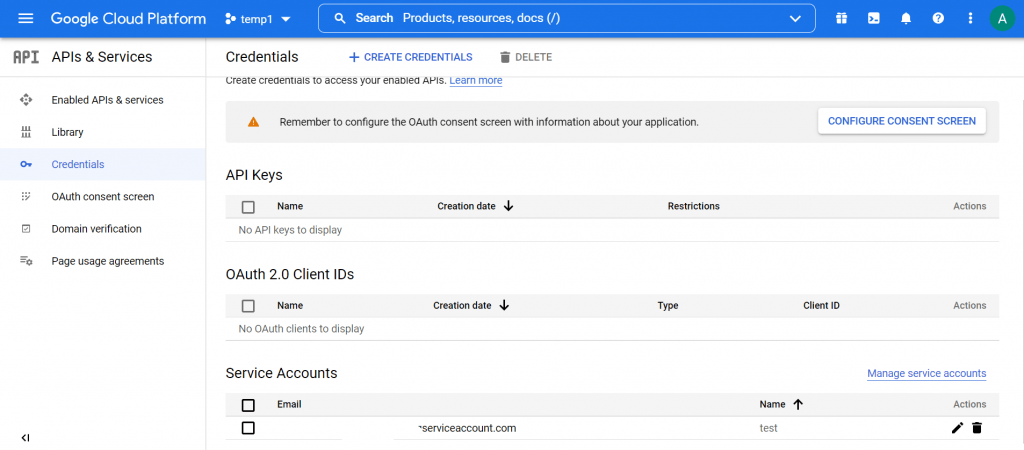
Now, select your service account and head on to the Keys section. Choose Add Key and download the generated JSON file. Now select the JSON file (or drag & drop) to complete this step. Make sure to enable Google Sheets API, which you’ll find from the search option of the Google Cloud Platform.
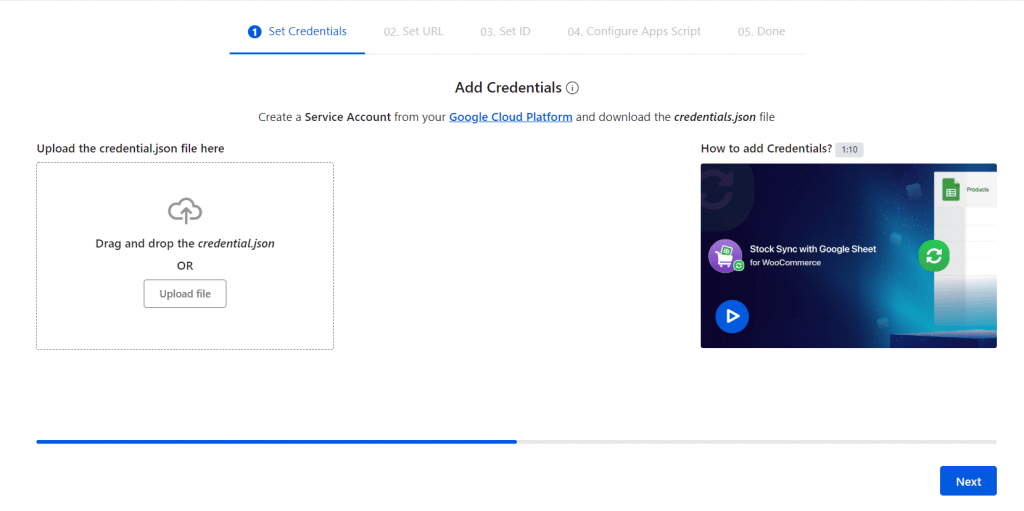
If you are finding these steps complex, you can check our step-by-step tutorial on YouTube.
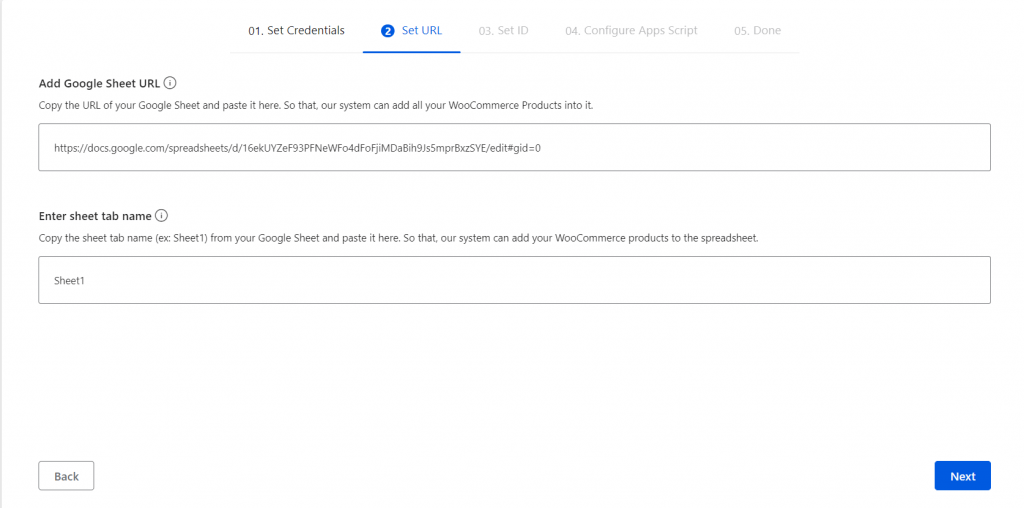
Next, create a spreadsheet from Google Sheets and share the URL from the address bar. Also, copy the tab name from the bottom of the spreadsheet and paste it during this step.
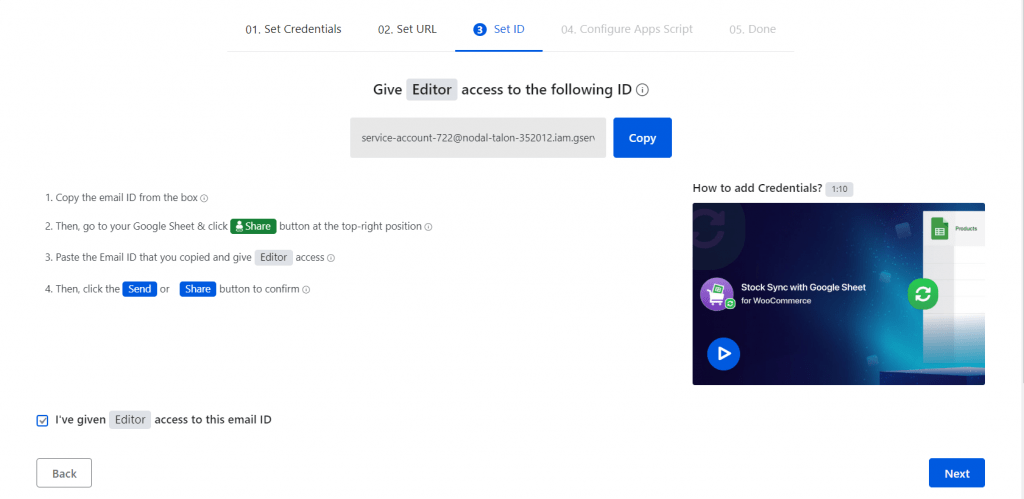
Next, you need to add editor access to the plugin to control spreadsheet products from WordPress. Copy the ID from this section and provide editor access from the spreadsheet by clicking on the Share button.
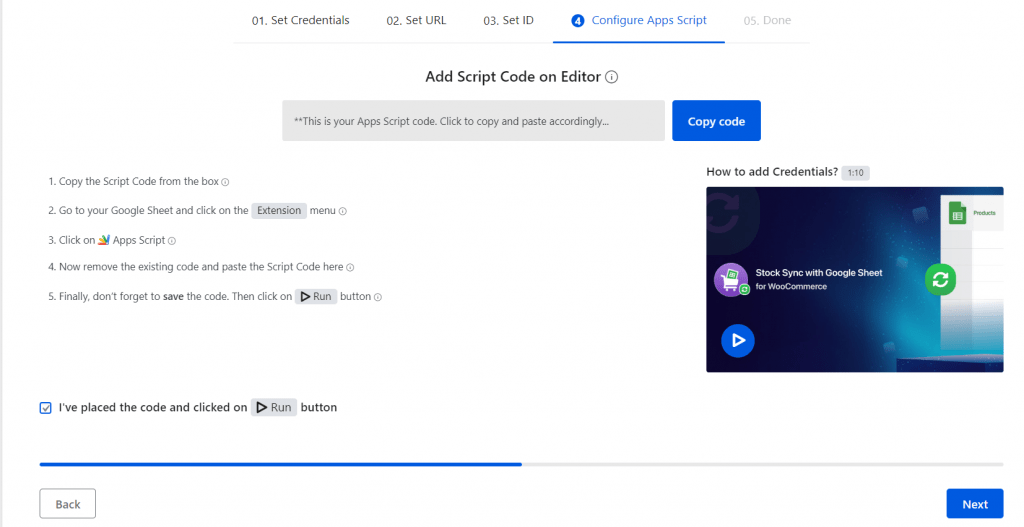
You’re almost ready! Navigate to Google Sheets -> Extensions -> Apps Script. Remove the existing code from the editor and paste the code that you’ve just copied from the plugin and click on Save Project. From the left panel, go to Triggers and select Add Trigger. Find the dropdown for Choose which function to run and select onEdit. Similarly for Select event type, select On edit. Click on Save to save changes. If you are trying these steps for the first time Google will ask for your permission. Click on Allow to create the trigger.
Finally, click on Sync with Google Sheet to enjoy reliable and fast live sync for WooCommerce products.
Conclusion
Every single one of our plugins is made while keeping your comfort in mind. Still, we face complications from time to time. We want to take this moment to thank you for your patience once again!
Take your WooCommerce store to another step with next-generation live sync. If you have any queries or suggestions regarding our products, feel free to let us know via comments.


