How to Add Product Attributes in WooCommerce
Product attributes in WooCommerce are characteristics you assign to products like size, color, material, or brand. They let you create product variations (like a t-shirt in Small, Medium, Large) and add filterable specs that help customers narrow down search results.
Understanding Attributes vs Variations
Here’s a common point of confusion: attributes and variations aren’t the same, but they’re connected.
| Feature | Attributes | Variations |
| What they are | The properties themselves (Color, Size, Material) | Specific combinations that create unique products (Red + Large, Blue + Small) |
| Do they affect stock? | No | Yes, each variation tracks its own inventory |
| Do they affect price? | No | Yes, each variation can have a different price |
| Can it exist alone? | Yes | No, requires attributes first |
Two Ways to Add Attributes
WooCommerce allows you to add attributes in two ways, depending on how often you plan to use them.
Global Attributes (Recommended for Stores with Consistent Products)
Global attributes are created once and reused across multiple products. This is ideal for standardized properties like clothing sizes, colors, storage capacity, or materials.
They also make store management easier. For example, if you decide to rename an attribute value (like changing “Blue” to “Cerulean”), updating it once will automatically update it across all products.
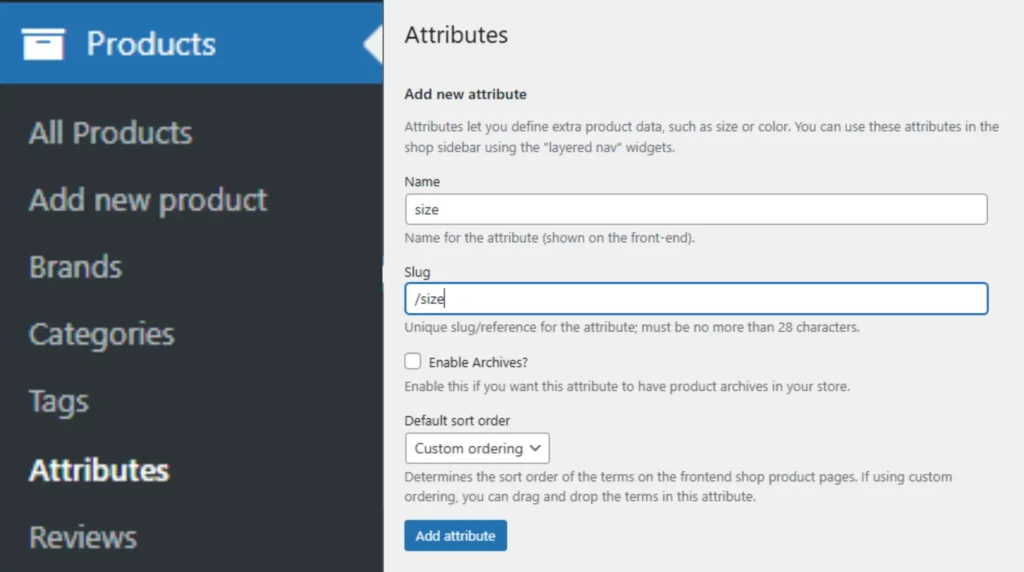
How to create global attributes
- Go to Products → Attributes in your WordPress dashboard
- Add a new attribute:
- Name → What customers see (example: Size)
- Slug (optional) → URL-friendly version (example: size)
- Enable Archives (optional) → Creates attribute archive pages like:
- yoursite.com/color/black
- Useful if you want to link filtered products in menus
- Default Sort Order:
- Name → Alphabetical order
- Name (numeric) → Best for numbers like sizes
- Term ID → System order
- Custom ordering → Manual drag-and-drop sorting
- Click Add Attribute
- Click Configure Terms
- Add attribute values like:
- Small
- Medium
- Large
- Click Add New Attribute Value
- Repeat as needed
Once created, this attribute becomes available for all products.
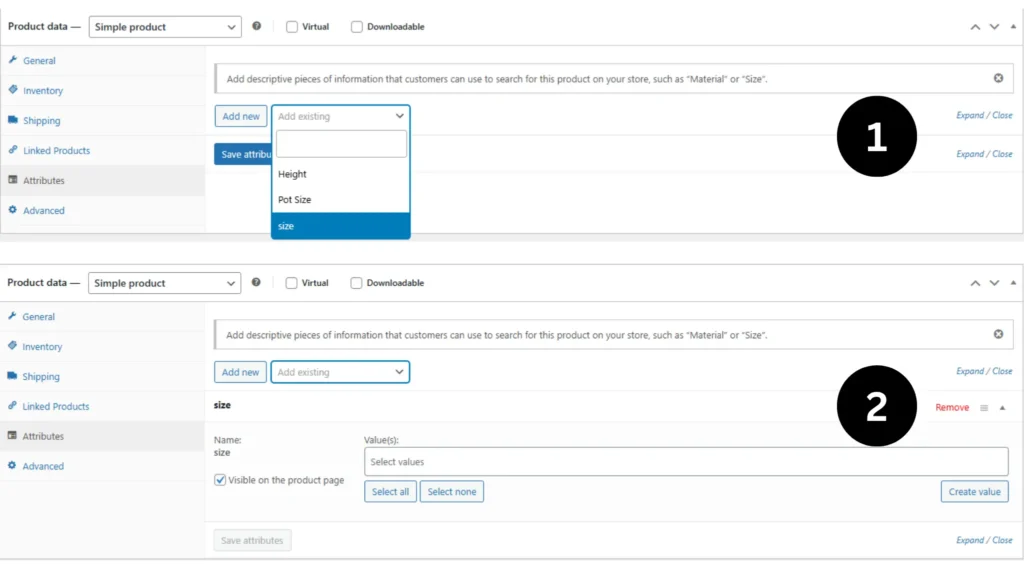
How to add global attributes to a product
- Go to Products → Add Product (or edit an existing one)
- Go to Product Data → Attributes
- Select your global attribute from the dropdown (example: Color)
- Click Add
- Add values:
- Select individual values
- Click Select all
- Or create new values (these will also be saved globally)
- Optional settings:
- Visible on product page → Shows attribute to customers
- Used for variations → Required for variable products
- Click Save Attributes
- Update the product
Note:
The order you arrange attribute values determines how they appear on the product page dropdown.
Custom Product Attributes (For One-Off Specs)
Sometimes you only need an attribute for one specific product. For example:
- Edition Number for collectibles
- Engine Type for a unique motorcycle model
- Vintage Year for a special product batch
In these cases, custom attributes are faster.
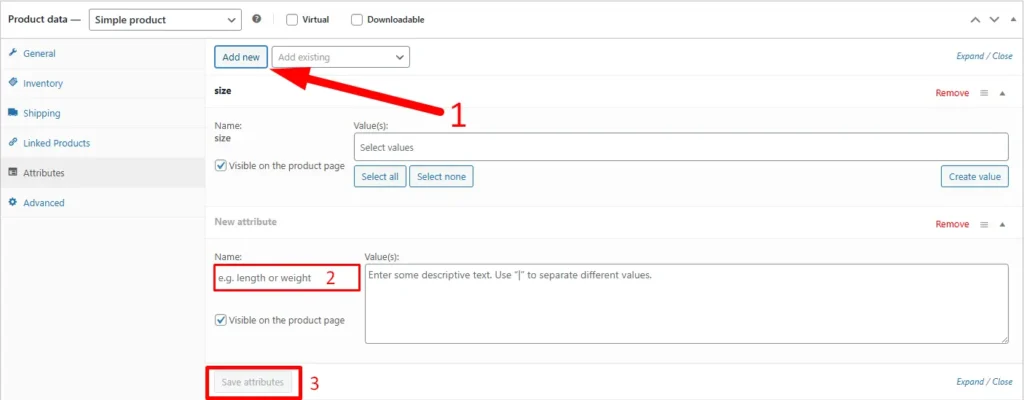
How to add custom attributes
- Edit the product
- Go to Product Data → Attributes
- Click Add
- Enter attribute name
- Enter values separated by the pipe symbol:
Example:
2018 | 2019 | 2020
- Check Visible on product page if needed
- Click Save Attributes
Important:
Custom attributes:
- Only exists for that product
- Cannot be reused globally
- Do not appear in global filters
Making Attributes Actually Useful
Most stores stop after adding attributes. But they become more valuable when:
- You enable product filtering (sidebar widgets or filter plugins)
- You use them in layered navigation for customers to refine searches
- You keep backend-only attributes (like “Supplier Code”) hidden from customers
When Managing Hundreds of Attributes
Here’s where it gets messy: fixing attribute typos across 200 products, or adding new attribute values to 50 items at once.
One-by-one editing? Brutal.
This is where tools like FlexStock help by syncing your product catalog, including attributes, into Google Sheets. Filter, fix inconsistencies in bulk, and sync changes back to WooCommerce automatically.
Quick Tips to Avoid Mistakes
- Start with 3-5 global attributes max
- Use consistent naming (“Red” vs “red” = different values in WooCommerce)
- Make frequently-used attributes global, not custom
- Always check “Used for variations” when creating variable products