Today we will learn how to easily add a Jitsi meeting in Tutor LMS. This powerful integration will enable a new way to connect with your students via online meeting.
Before we start, please ensure that Jitsi Meet Ultimate and Tutor LMS are installed on your WordPress site.
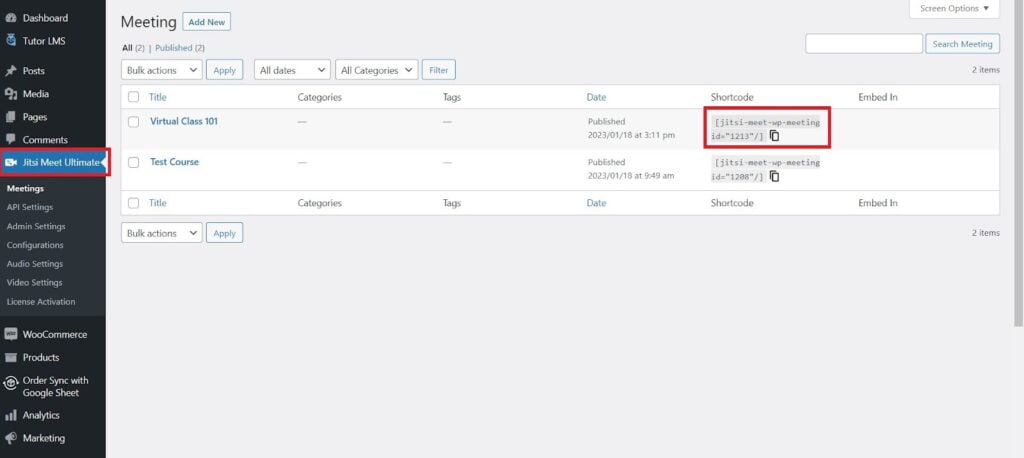
First, go to your WordPress dashboard and navigate to Jitsi Meet Ultimate > Meetings. Then create a new meeting by clicking on Add New on top. Once you create the meeting with your desired settings, it will generate a shortcode that you can use later in Tutor LMS.

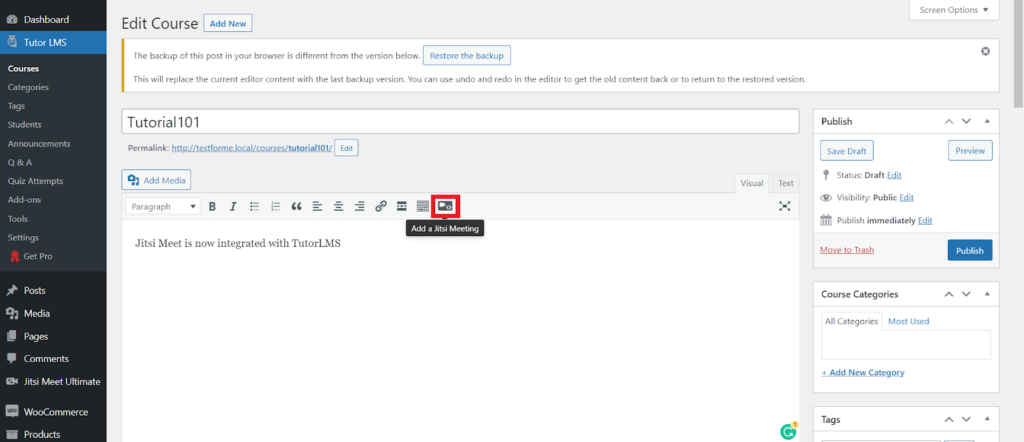
Next, navigate to Tutor LMS > Courses > Add New. After setting up all course materials, click on the icon on the top-right section that says Add a Jitsi Meeting.

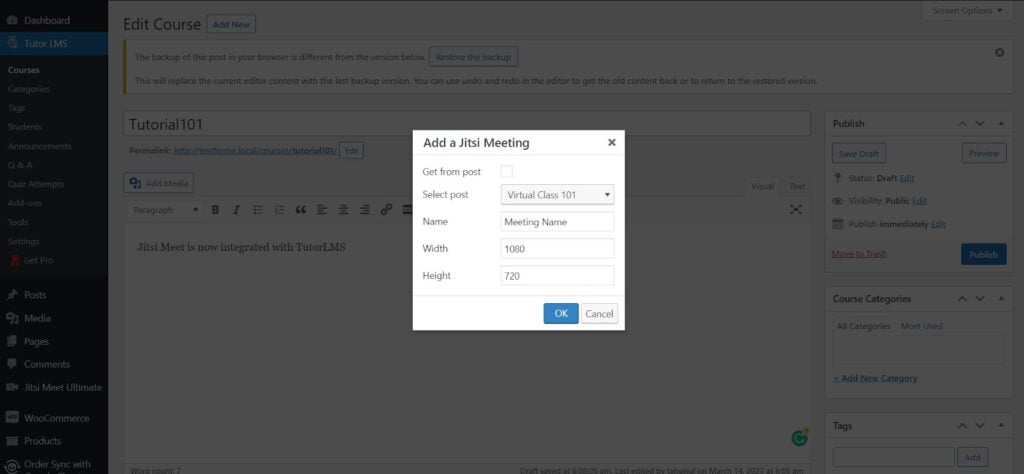
Select the meeting you just created or select any previous meeting. Alternatively, you can also paste the meeting shortcode anywhere in your course.

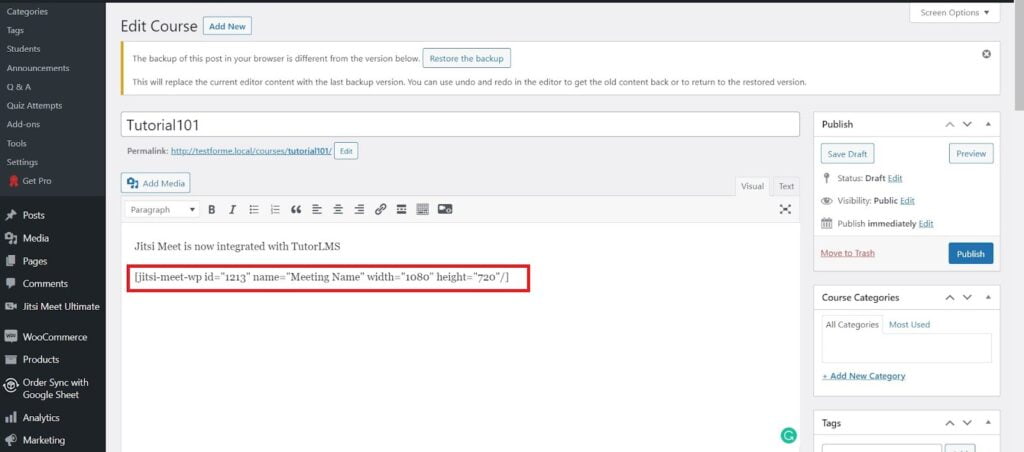
Once you confirm, the meeting will be added to your course.
Bonus tip: You can also add the Jitsi meeting to any lesson within your course.

Finally, publish the course, and the Jitsi meeting will be displayed alongside other course materials.


Add your first comment to this post