









First, install and activate WooCommerce if it’s not already activated on your website.
Video Tutorial: #
You can follow this video to learn to installation & activation process of the plugin step-by-step:
Install & Activate The Plugin #
You can activate and setup the plugin by following these steps:
Go to your WordPress admin dashboard. Navigate to the “Plugins” menu and click on the “Add New” button.
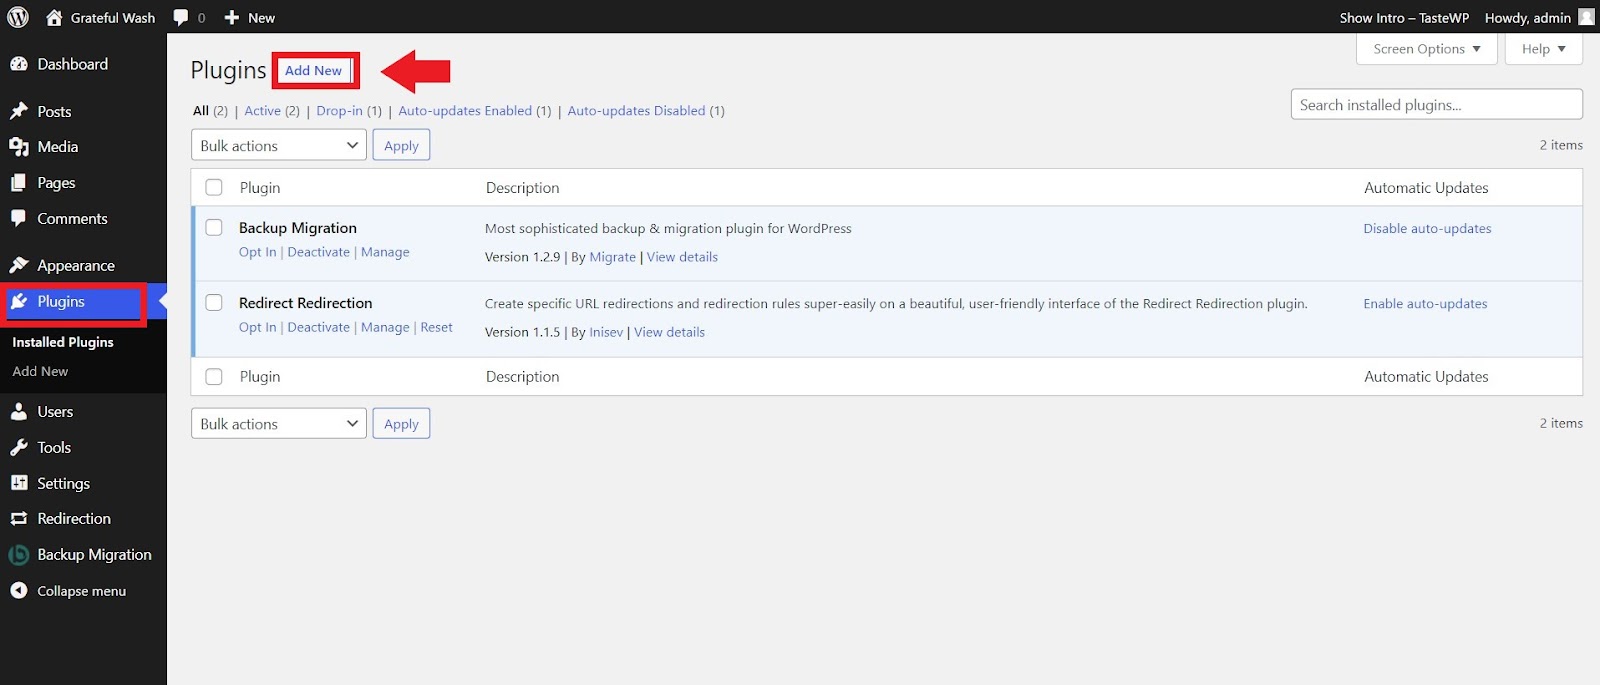
Now, search for “FlexStock”.

Click on the “Install Now” button and then activate the plugin by clicking the “Activate” button.
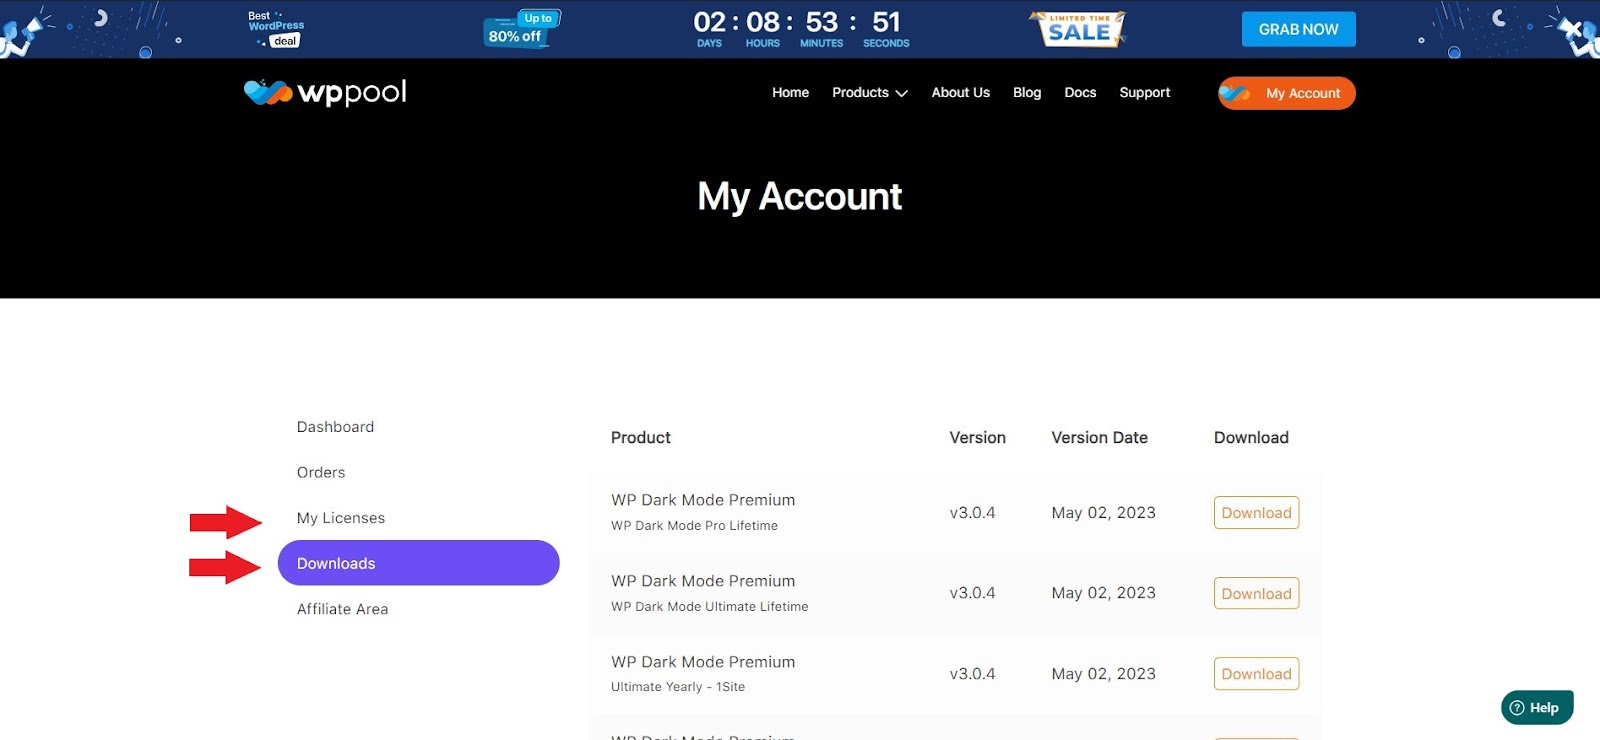
After activating the plugin, Now you’ll need to activate the Ultimate version of the plugin and the license key. To do that go to , → https://wppool.dev/my-account/
Login to your account to find a similar interface. From here you can download the Ultimate plugin’s zip and get your License Key.
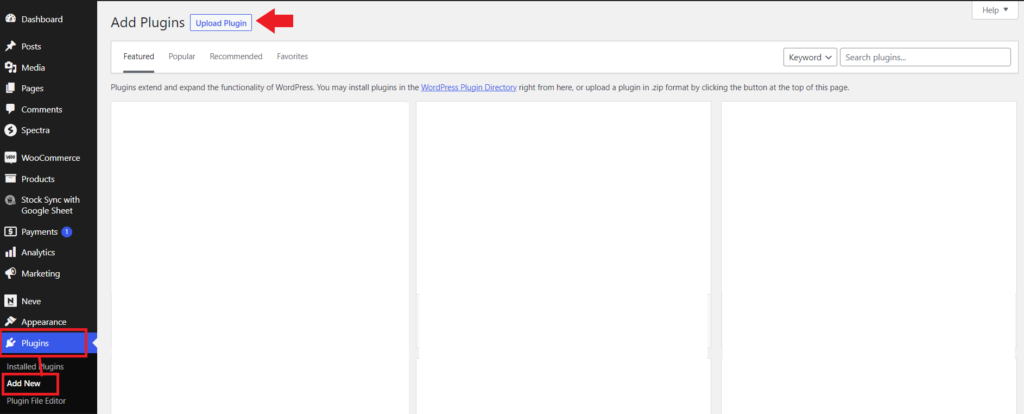
Now, go back to the WordPress dashboard and navigate to the Plugins menu. Click on Add New and then click on Upload Plugin.
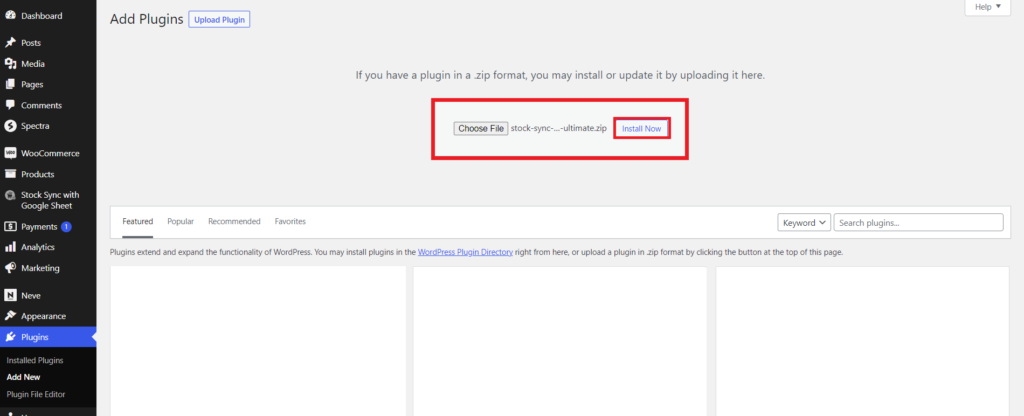
Upload the premium plugin file you just downloaded from your account and then hit “Install Now”. Also, activate the plugin in the next step.
In the next step, it will take you to the “Stock Sync with Google Sheet” plugin menu in your dashboard, and on the “License” tab enter your license key and activate the license.
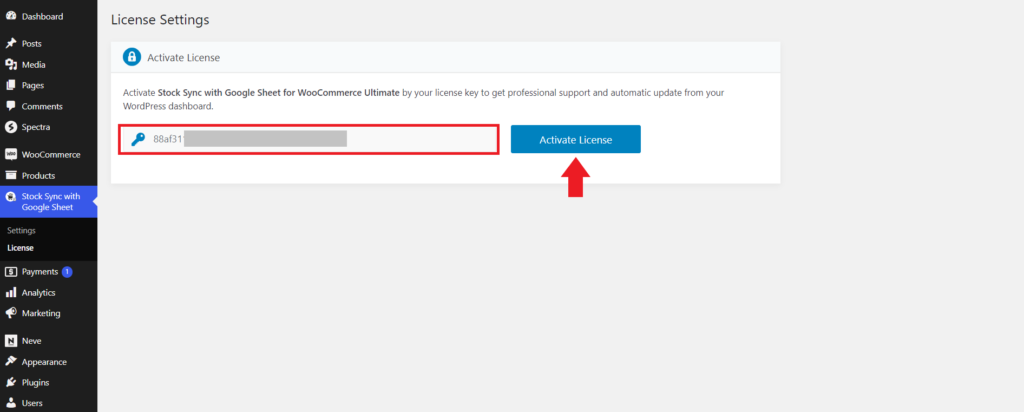
Now Stock Sync with Google Sheet Ultimate is ready for you to set up.
To complete the entire setup, Read our Setup Article →


Add your first comment to this post