- How to Archive Orders by Status
- Example Use Case
- How to use Advanced Order Filtering with ArchiveMaster
- Select Product Categories
- Choose the Category Matching Rule
- 1. At least one product belongs to any selected category
- 2. Every product in the order must belong to at least one selected category
- 3. The order contains at least one product from every selected category
- 4. Order contains products with exactly the selected categories
ArchiveMaster allows you to archive WooCommerce orders based on status. This helps you keep your order management dashboard clean and organized, while still keeping archived orders accessible when needed.
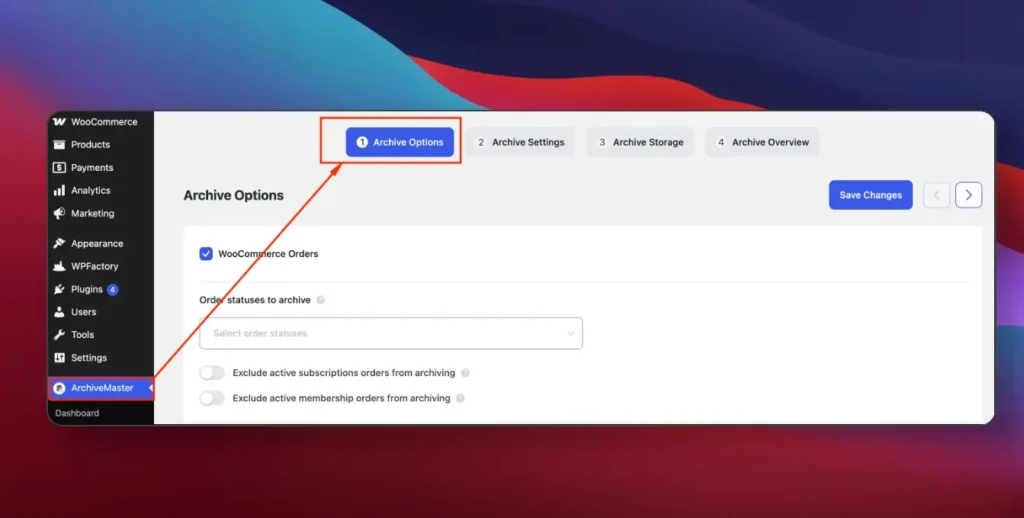
How to Archive Orders by Status #
From your WordPress Dashboard, go to: ArchiveMaster > Archive Options
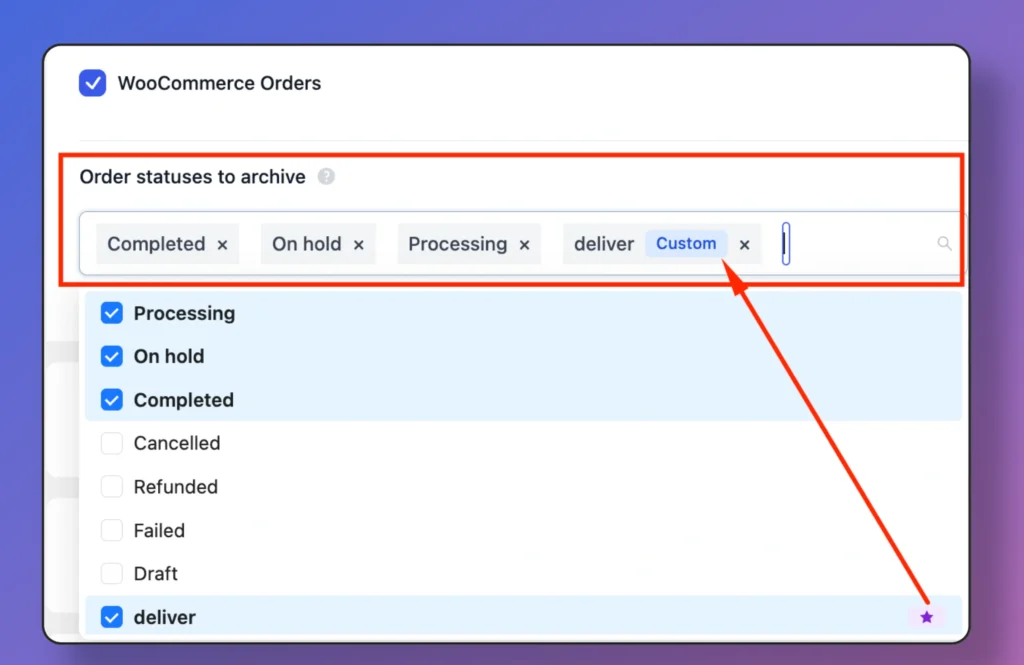
Select Order Statuses to Archive
In the Order statuses to archive section, you will see a dropdown list of all available WooCommerce Order statuses, including any custom order statuses you may have created (e.g., Completed, Cancelled, Refunded, plus your custom statuses). Select your preferred order statuses to archive.
Save Changes #
- Click Save Settings to apply your changes.
- Orders with the selected statuses will now be archived automatically.
Example Use Case #
- If you select Completed and Cancelled, all orders that match these statuses will be moved to the archive orders.
- This keeps your active orders list focused only on pending or processing orders, reducing clutter.
How to use Advanced Order Filtering with ArchiveMaster #
With Advanced Order Filtering, you can filter orders by product category and archive only those orders that contain products from selected categories. This gives you greater control over which orders are archived and helps keep your WooCommerce order list clean and organized.
Advanced Order Filtering
From your WordPress Dashboard, navigate to:
ArchiveMaster → Archive Options
Scroll down to find the Advanced Order Filtering section.
Enable Advanced Order Filtering
To start using advanced filters:
- Go to ArchiveMaster → Archive Options.
- Locate the Advanced Order Filtering toggle.
- Turn the toggle ON to enable advanced filtering.
Once enabled, you can add filters to define which orders should be archived.
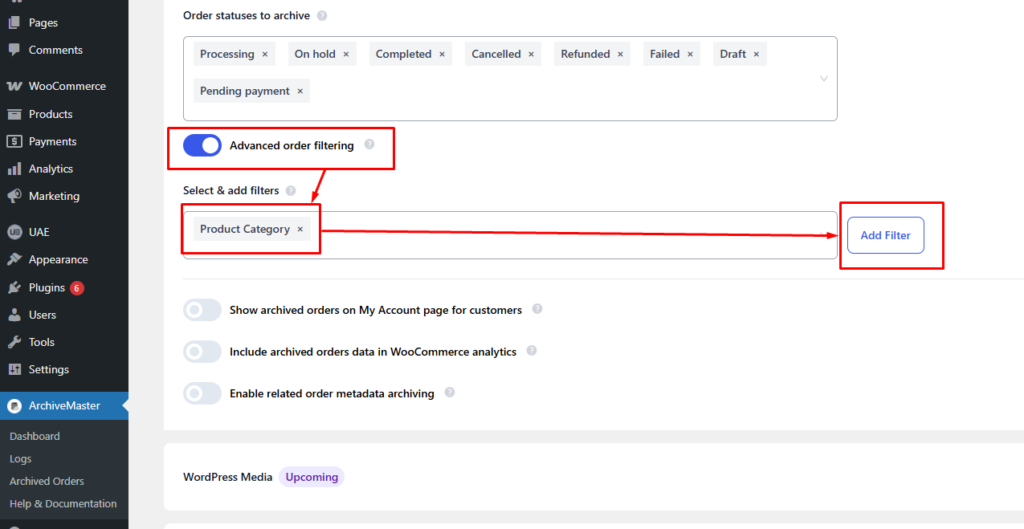
Add a Product Category Filter
To archive orders based on product categories:
- In the Select & add filters field, open the dropdown menu.
- Choose Filter by Product Category.
- Click Add Filter.
This will create a new filtering section for selecting product categories.
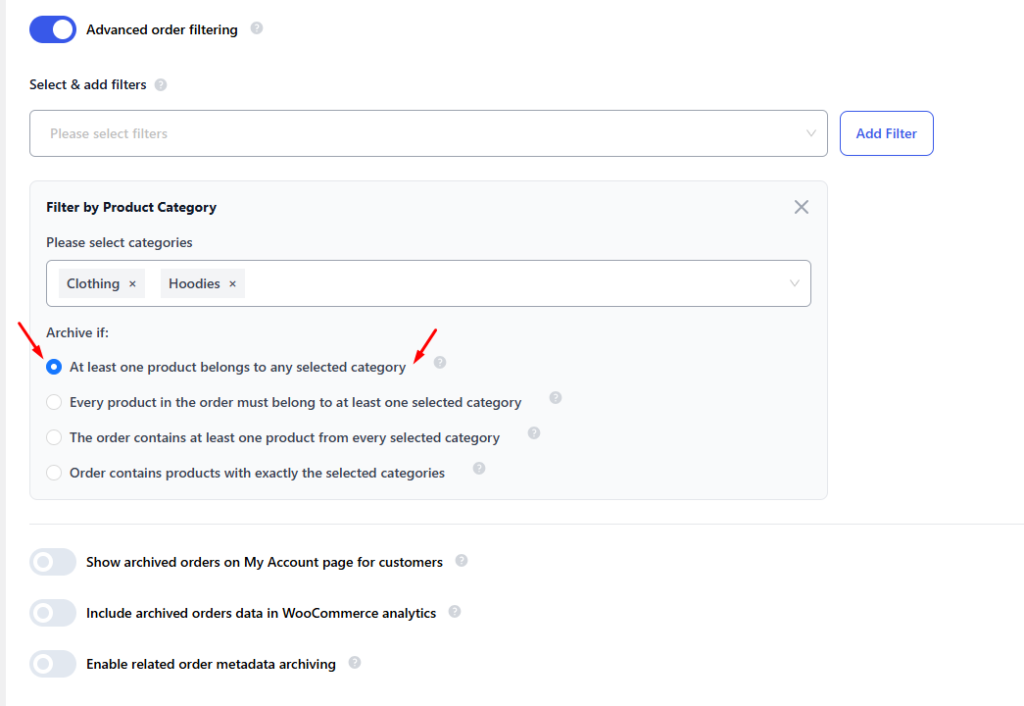
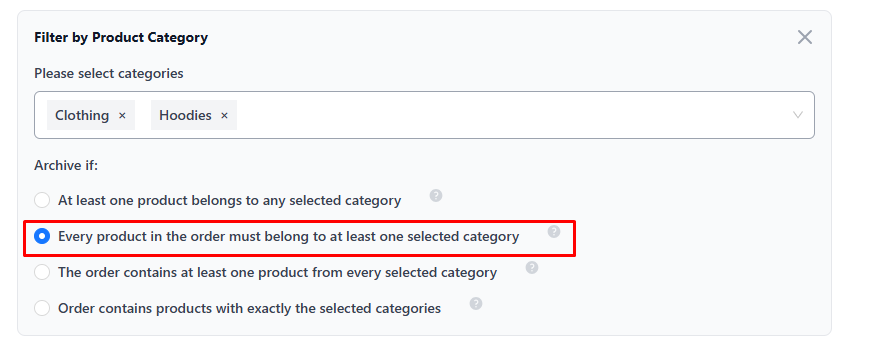
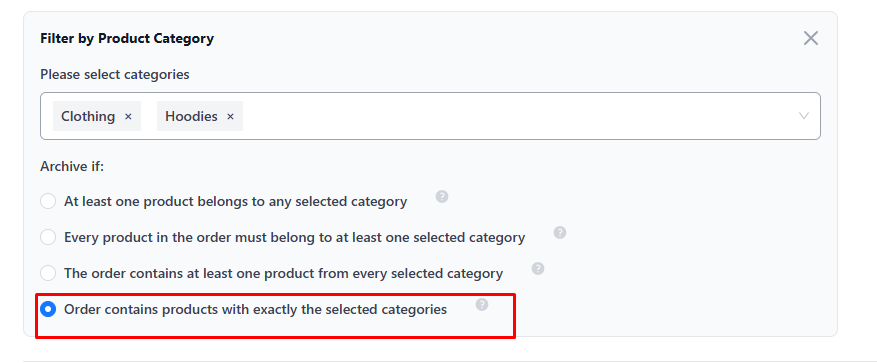
Select Product Categories #
Inside the Filter by Product Category section:
- Click the Please select categories dropdown.
- Select one or more WooCommerce product categories.
Example categories:
- Clothing
- Hoodies
ArchiveMaster will now evaluate orders based on these selected categories.

Choose the Category Matching Rule #
After selecting categories, you must define how the filter should match orders.
ArchiveMaster provides several matching rules:
1. At least one product belongs to any selected category #
An order will be archived if at least one product in the order belongs to any selected category.
Example – Selected categories:
- Clothing
- Hoodies
Order contains:
- T-shirt (Clothing)
- Coffee Mug (Accessories)
Result:
✅ The order will be archived
2. Every product in the order must belong to at least one selected category #
The order will only be archived if all products in the order belong to the selected categories.
Example – Selected categories:
- Clothing
- Hoodies
Order contains:
- Hoodie
- T-shirt
Result:
✅ Archived
Order contains:
- Hoodie
- Coffee Mug
Result:
❌ Not archived
3. The order contains at least one product from every selected category #
The order must include at least one product from each selected category.
Example – Selected categories:
- Clothing
- Hoodies
Order contains:
- Hoodie
- T-shirt
Result:
✅ Archived

4. Order contains products with exactly the selected categories #
The order will be archived only if the products belong exactly to the selected categories and no others.
Example – Selected categories:
- Clothing
- Hoodies
Order contains:
- Hoodie
- T-shirt
Result:
✅ Archived
Order contains:
- Hoodie
- T-shirt
- Coffee Mug
Result:
❌ Not archived


Add your first comment to this post