These step-by-step instructions explain how vendors can create a Jitsi meeting and add it as a product for sale inside MarketKing — Ultimate WooCommerce Multivendor Marketplace Solution using the Multivendor Addon included in Jitsi Meet Ultimate.
You can use this feature to sell:
- webinars
- online classes
- consultations
- coaching sessions
- private meetings
Before You Start #
Please make sure the following plugins are already installed and active on your website:
- WooCommerce
- Jitsi Meet Multivendor Addon (included in the Ultimate package)
- MarketKing — Ultimate WooCommerce Multivendor Marketplace Solution
The Multivendor Addon is required for vendors to create and sell meetings.
Step 1: Install the Multivendor Addon #
First, activate the Multivendor Addon.
- Go to your WordPress Dashboard
- Open Jitsi Meet Ultimate
- Click Add-ons
- Find Multivendor Addon
- Click Install or Activate
- If already active, make sure it is updated
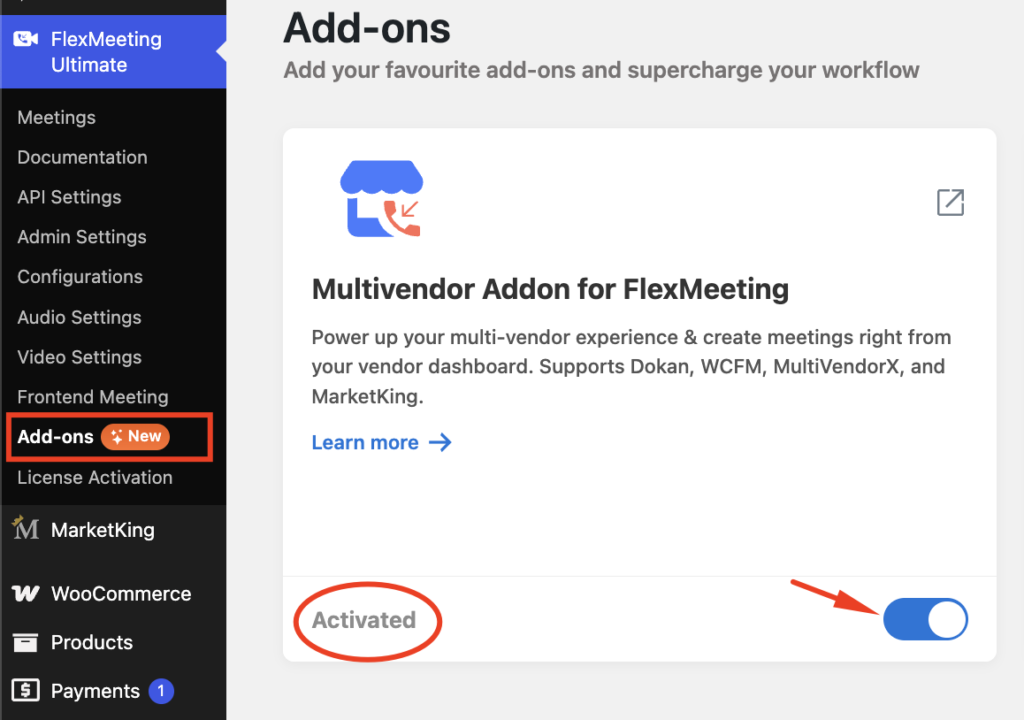
Once activated, vendors can create meetings from their dashboard.
Step 2: Open the Vendor Dashboard #
Next, log in as a vendor.
- Go to your MarketKing Vendor Dashboard
- Click Create New Meeting
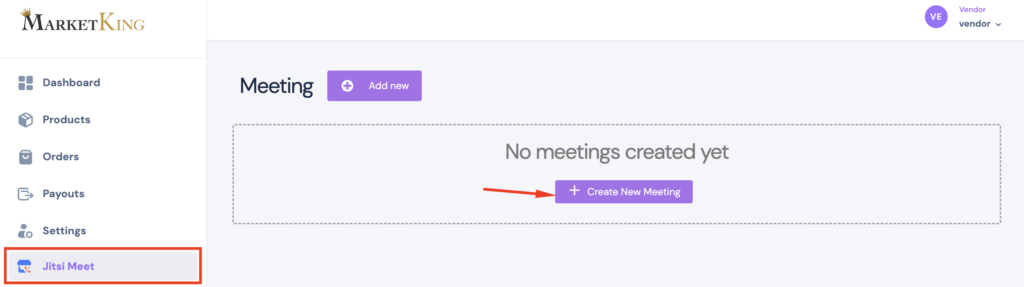
This will open the meeting setup page.
Step 3: Create Your Meeting #
On the meeting setup page:
- Enter the meeting title
- Add a short description
- Select the date and time
- Choose your preferred meeting settings
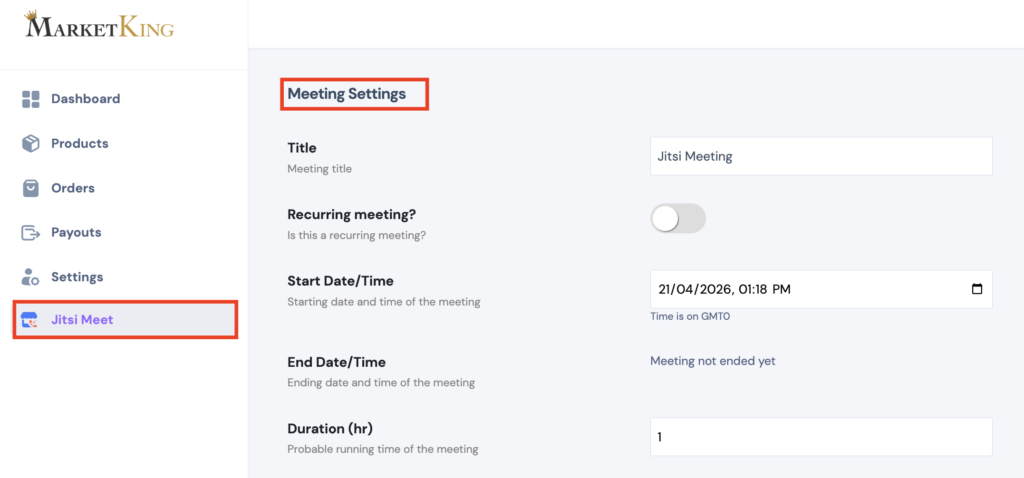
After completing the details, click Create Meeting
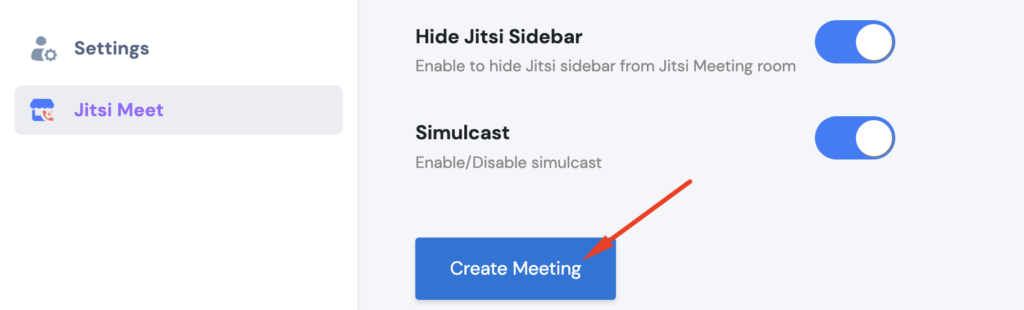
Your meeting has now been created and is ready to be linked to a product.
Step 4: Add the Meeting as a Product #
To allow customers to purchase access to the meeting, you need to connect it to a product.
Follow these steps:
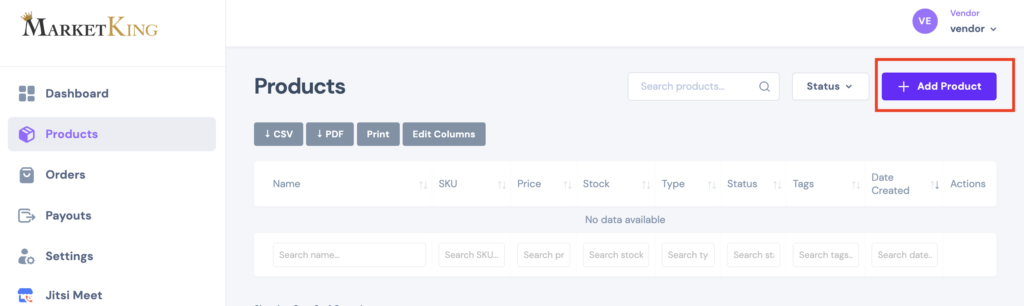
- Go to Products in your Vendor Dashboard
- Click Add Product
Enter:
- product title
- price
- description
- Choose your preferred meeting settings

Next:
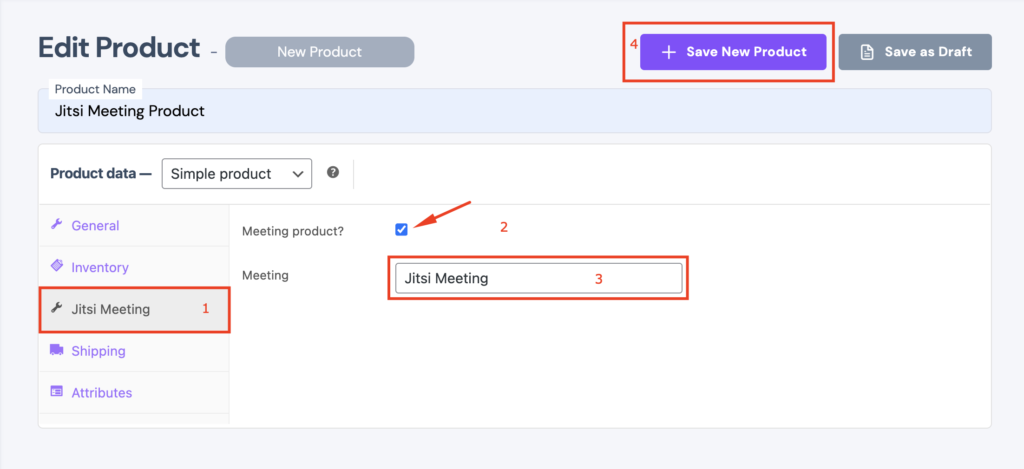
- Open the Jitsi Meeting tab
- Tick the “Meeting product?” checkbox to mark this product as a meeting.
- Select your meeting from the Meeting dropdown list
- Adjust any additional product settings if needed
- Click Save New Product
Your meeting is now available for customers to purchase.

What Happens After This #
- Your meeting becomes a product in your store
- Customers can purchase access
- You can manage the meeting from your dashboard
- The marketplace can support webinar-based services
This makes it easy to sell live sessions directly through your vendor store.


Add your first comment to this post