The Dropdown Field feature in FormyChat allows you to add selectable options to your floating widget form, making it easier to collect organized and relevant user information. This documentation explains how to create and use a Dropdown Field in the following simple steps:
- Add a dropdown field to your FormyChat floating widget form
- Customize its label, position, and options
- Require users to select an option before submission
- Use the selected value dynamically in message templates
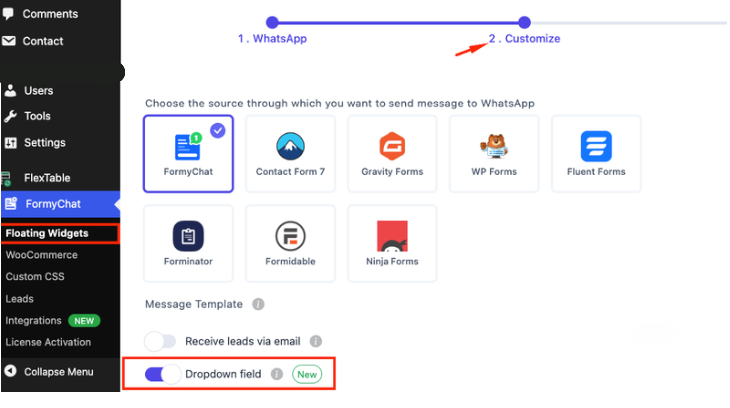
Where to Enable #
Navigate to FormyChat → Floating Widgets → Customize, then scroll to the Customize Form section and enable the “Dropdown field” option.
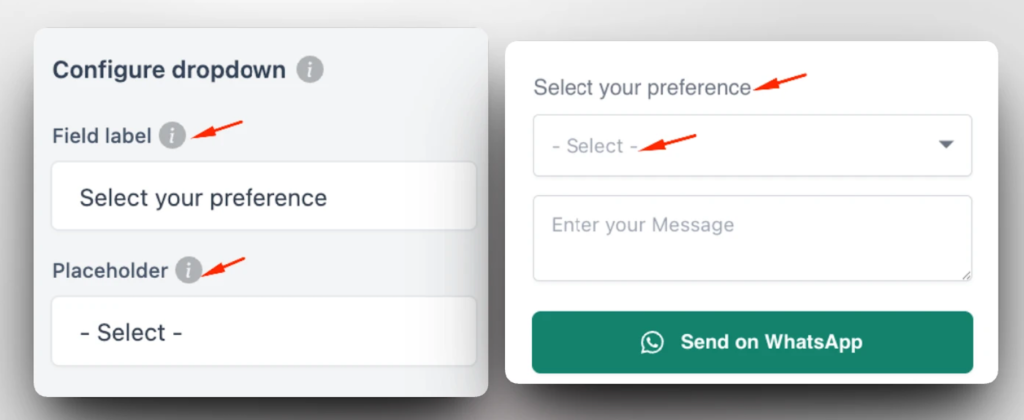
Configure the Dropdown:
Each setting controls a specific part of how the dropdown behaves and appears.
Field Label #
- Displayed above the dropdown in the form
- Use simple and clear wording
Placeholder (Optional) #
- Adds a default first row with no value
- Encourages users to actively choose an option
Example: – Select – , Choose one…
If left empty, the first option will be selected by default.
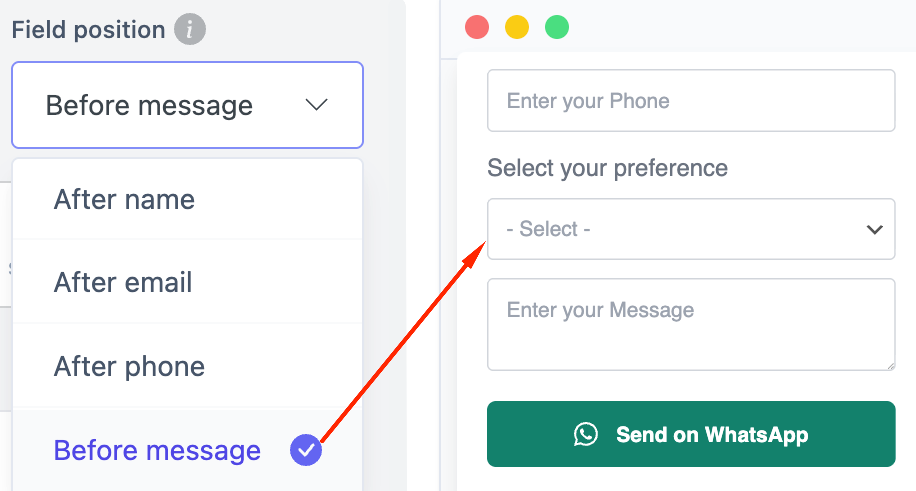
Field Position #
Determines where the dropdown appears in relation to other fields:
- After Name
- After Email
- After Phone
- Before Message
Best Practice: Place it before the message field if it helps define the user’s intent early (e.g., topic selection).
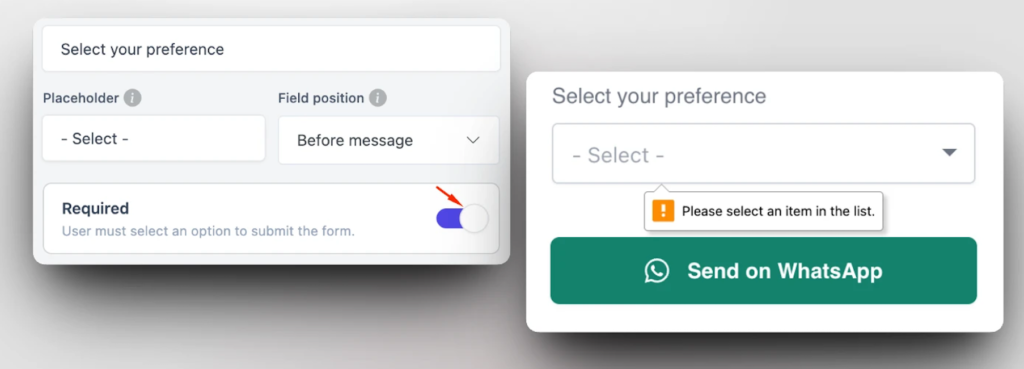
Required Field #
- When enabled, users must select an option before submitting the form
- Helps ensure complete and useful data collection
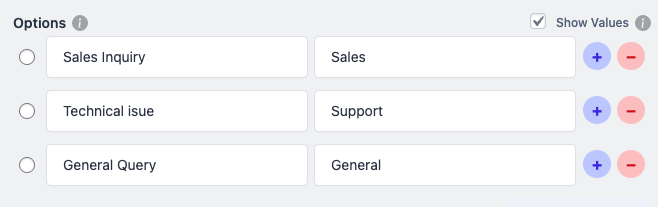
Add Dropdown Options: Create menu choices for your form. Each row is one option visitors can select.
Label = What visitors see (e.g., “Sales Inquiry”)
Stored Value = What gets saved and sent to you (e.g., “sales”)
Show Values Toggle #
☐ Unchecked: Stored value automatically matches the label.
☑ Checked: Set custom stored values different from labels. Show friendly text to visitors while saving short codes for yourself.
Managing Options #
+ Add more options | – Remove an option
Requirement: Add at least one row with both fields filled in.
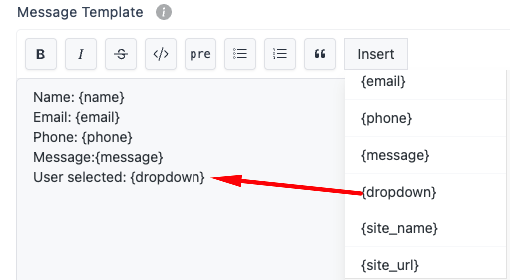
Use Dropdown Value in Message Template #
You can insert the selected value dynamically into your message.
Steps: #
- Go to your Message Template
- Click Insert →
- Select your dropdown field key
- Use it like: User selected: {dropdown}
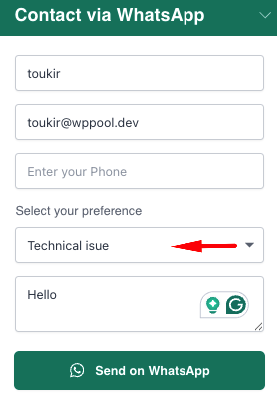
Save and Test #
- Save your changes
- Open the widget on your site
- Select an option and submit
- Check if the value appears correctly in WhatsApp
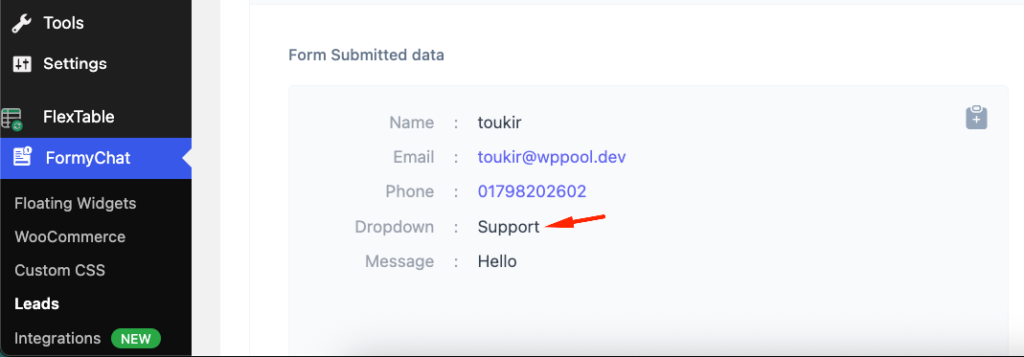
Result #
- Dropdown shows in your form
- Users select an option
- Selected value is sent in messages and saved in leads
Best Practices #
- Keep labels short and easy to understand
- Use placeholders to guide user action
- Limit options to avoid overwhelming users
- Use meaningful stored values for backend processing
- Place dropdowns logically within the form flow


Add your first comment to this post